Build-A-Rig Round 2, SilverStone vs Crucial: The $800 PC Build Logs
by Daniel Williams on November 4, 2015 2:00 PM EST- Posted in
- Build-A-Rig
- Crucial
- SilverStone
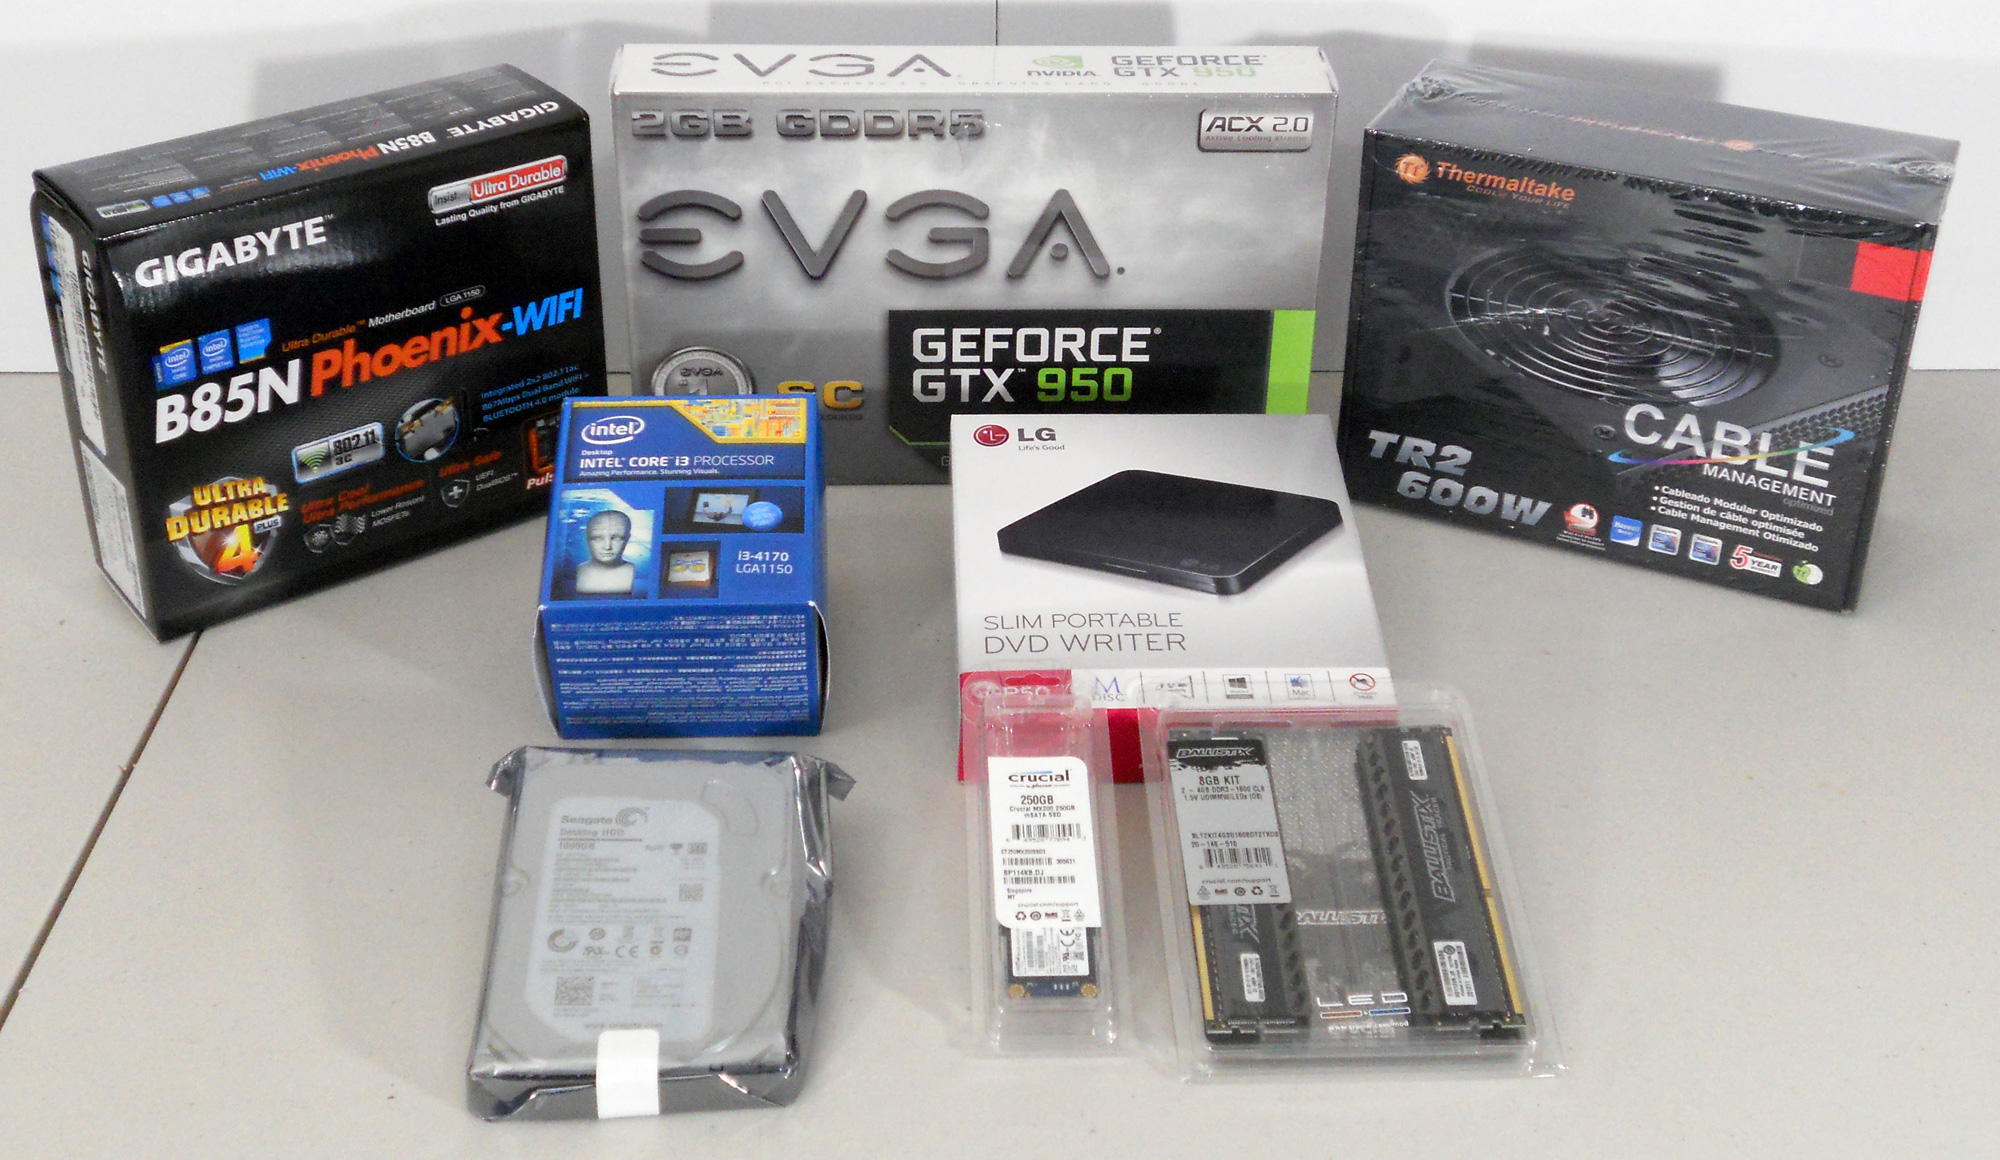
Building Crucial's Ballistix Bantam
| Crucial's Ballistix Bantam | |||
| Component | Selection | Price as Chosen |
90-Day Average |
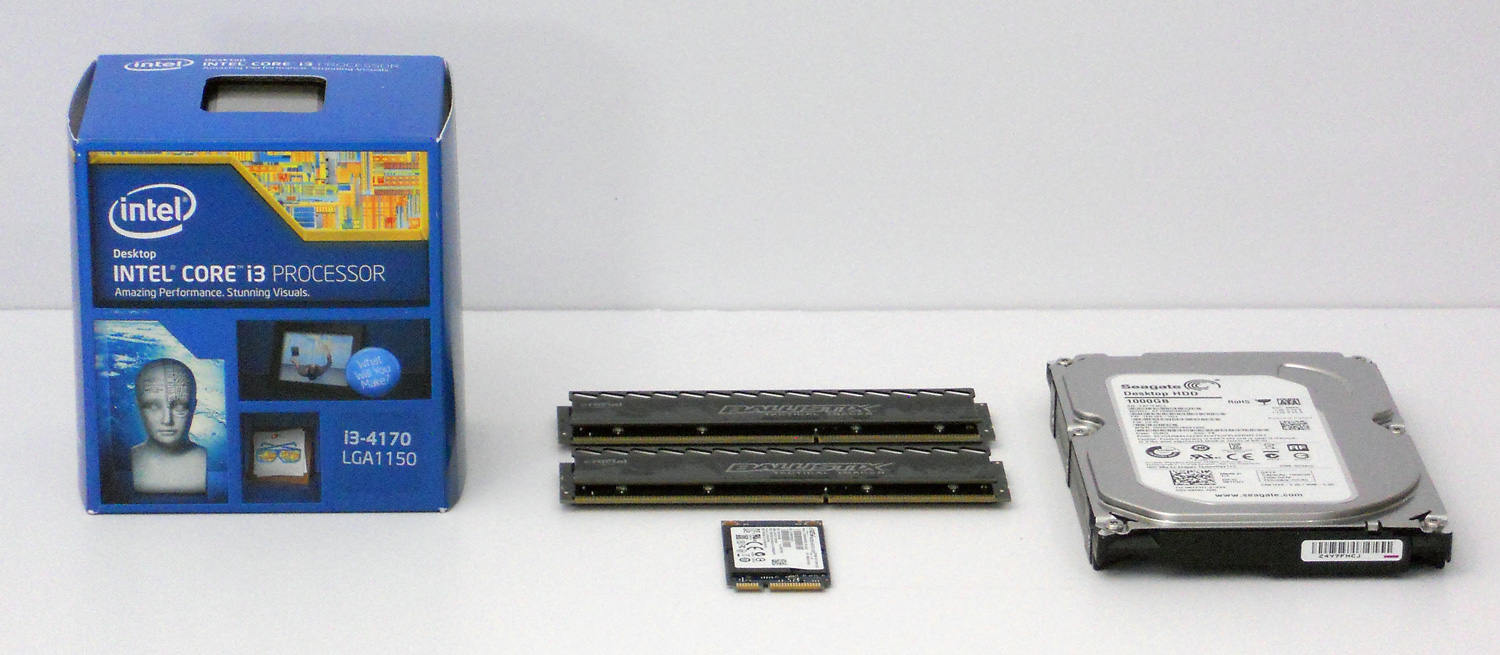
| Processor (CPU) | Intel Core i3-4170 (2C/4T, 3.7 GHz) | $124.99 | $124.82 |
| Motherboard | GIGABYTE GA-B85N Phoenix-WiFi | $84.99 | $84.99 |
| Graphics Cards (GPU) | EVGA GeForce GTX 950 | $159.99 | $159.99 |
| Memory (DRAM) | Crucial Ballistix Tactical Tracer 2x4GB DDR3-1600 C8 |
$47.99 | $48.92 |
| Storage (SSD) | Crucial MX200 mSATA 250GB | $94.99 | $94.99 |
| Storage (HDD) | Seagate Barracuda 1TB 7200RPM | $50.99 | $49.81 |
| Power Supply (PSU) | Thermaltake TR2 600W | $54.99 | $55.05 |
| Chassis | Thermaltake Core V1 Extreme Cube | $49.99 | $49.99 |
| CPU Cooling | None | - | - |
| Operating System | Microsoft Windows 8.1 64-bit OEM | $99.99 | $99.99 |
| Extras | LG USB 2.0 Portable DVDRW | $24.99 | $24.99 |
| Total | $793.90 | $793.54 | |
Starting things off with the case, the ThermalTake Core V1 feels solid enough both assembled and with all the panels removed, I never felt like I was going to have a panel bend on me or that I had to be concerned about where I lifted the frame.

For the Thermaltake TR2 600W PSU install I laid the case on its face, pulled the cables through the bottom and then the side, and held the PSU in its final resting place while I screwed it in. I actually found this to be one of the easiest PSU installs I had ever done, lots of room and all the screw holes in the case left ample room to line up the mounting screws without struggle.
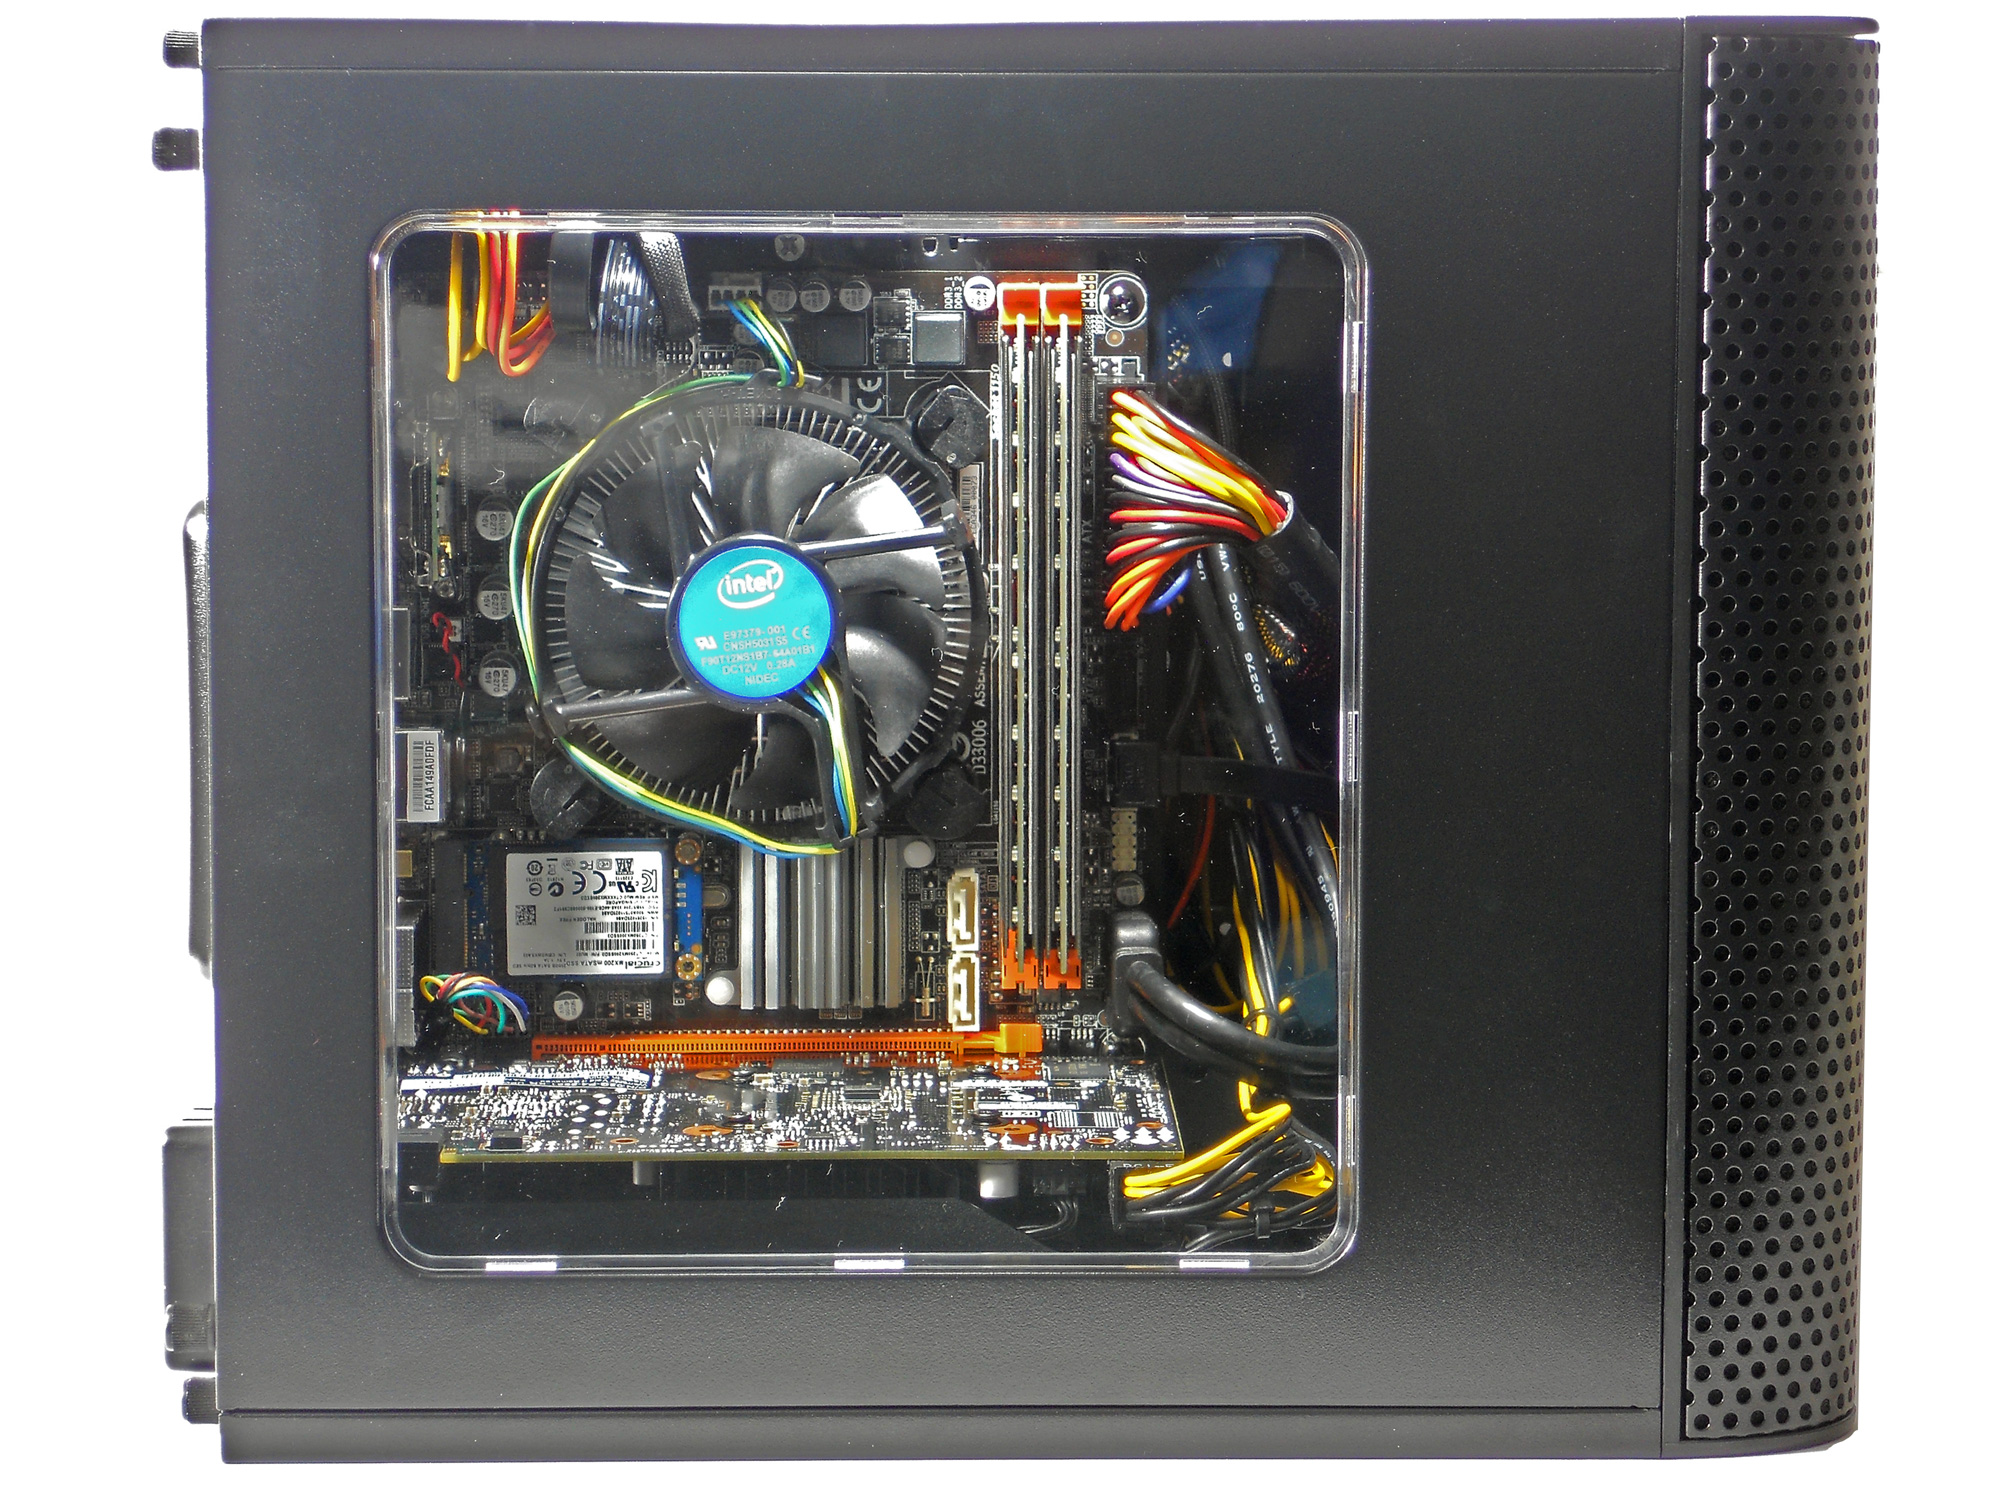
Installing the i3-4170 CPU and stock cooler were standard fare, though it is worth noting that the CPU fan header was well placed so that the HSF fan cable had a perfectly reasonable amount of slack. Looks to me like they did it on purpose, small props to Gigabyte there. On to the ram slots they only have a latch at one end but still lock on the other end. Meaning that while I would install RAM pressing the stick straight in as usual, when uninstalling the ram I have to pull from the latch end to get the stick out. Less work I guess but different than what I’m used to.
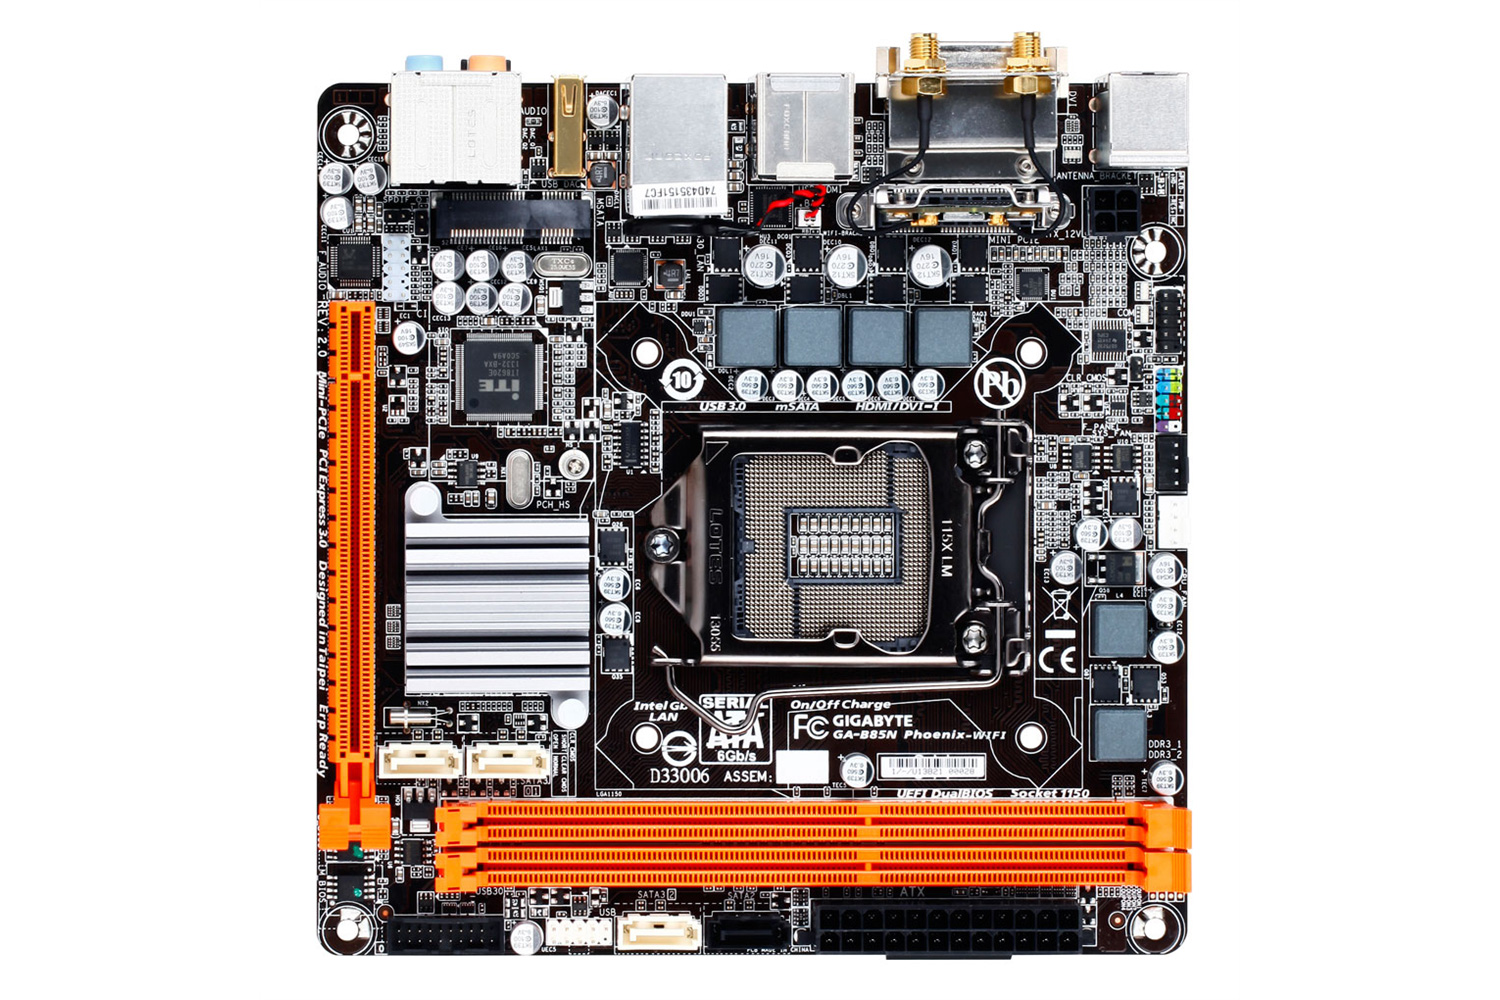
The motherboard just drops right in from the top and is screwed into standoffs that are formed into the sheet-metal. One small issue placing the motherboard into place was the rear I/O panel, there was a metal flap covering the gold plated USB 2.0 port hole that needed to be pushed out of the way as I moved the motherboard into place.
Front panel audio is routed away from the motherboard in an attempt to avoid EMI from motherboard getting into the front panel audio. The EVGA GeForce GTX 950 was easy to install in an open case like this. Just drop it in and screw it down, snapping the plastic screw cover back on after tightening down the card. Since the included Wi-Fi adapter was already installed I didn't need to do anything there and the Crucial MX200 mSATA SSD 250GB install was simple, just slip the drive into the mSATA slot and fasten one screw down.
Special care was taken behind HDD tray that made for much neater though not perfect cable runs. I first separated the 8-pin CPU power into just a 4-pin to limit clutter. I then ran all of the cables behind the tray, attempting to leave just enough to arc down to the slot, especially since the sleeving for the front panel fan both doesn't terminate in the connector and also kinks easily, so some arch was necessary to maintain a neat look. After the cabling was situated I fastened them all together with a four inch cable tie just out of sight behind the motherboard tray.
On the topic of cable management the wires coming out of the Thermaltake TR2 600W were a bit of a mess. What I saw when sorting out the various connectors was that a few of the connectors would have wires randomly threaded through a wire bunch from another connector. Causing the cabling to appear as a tangled mess at the base of the wires regardless of what I did. In the end I had to relegate the mess caused by this to the nest of wires left under the motherboard tray. Out of sight out of mind, I suppose?
After the cable management was settled in that corner of the case by the drive cages I was ready to install the Seagate Barracuda 1TB 7200RPM drive. I didn't find the HDD sleds here to be a great experience. It looks like they are supposed to wedge in between the motherboard tray and the bottom corner of the case, but being sheet metal I am left afraid of bending the trays as I remove or install them. Once out it took a little extra time for me to realize that I needed to slip the rubber mounts in first, then line the drive up and screw it in place. The instruction didn't clarify to this level of detail either. When I had the HDD tray situated and the cable management settled in I slipped the tray back in and fastened it with the single thumb screw. Space was quite tight here between the HDD and the CPU cooler, so anyone who with particularly large hands may need to use a screwdriver here to tighten the screw down.
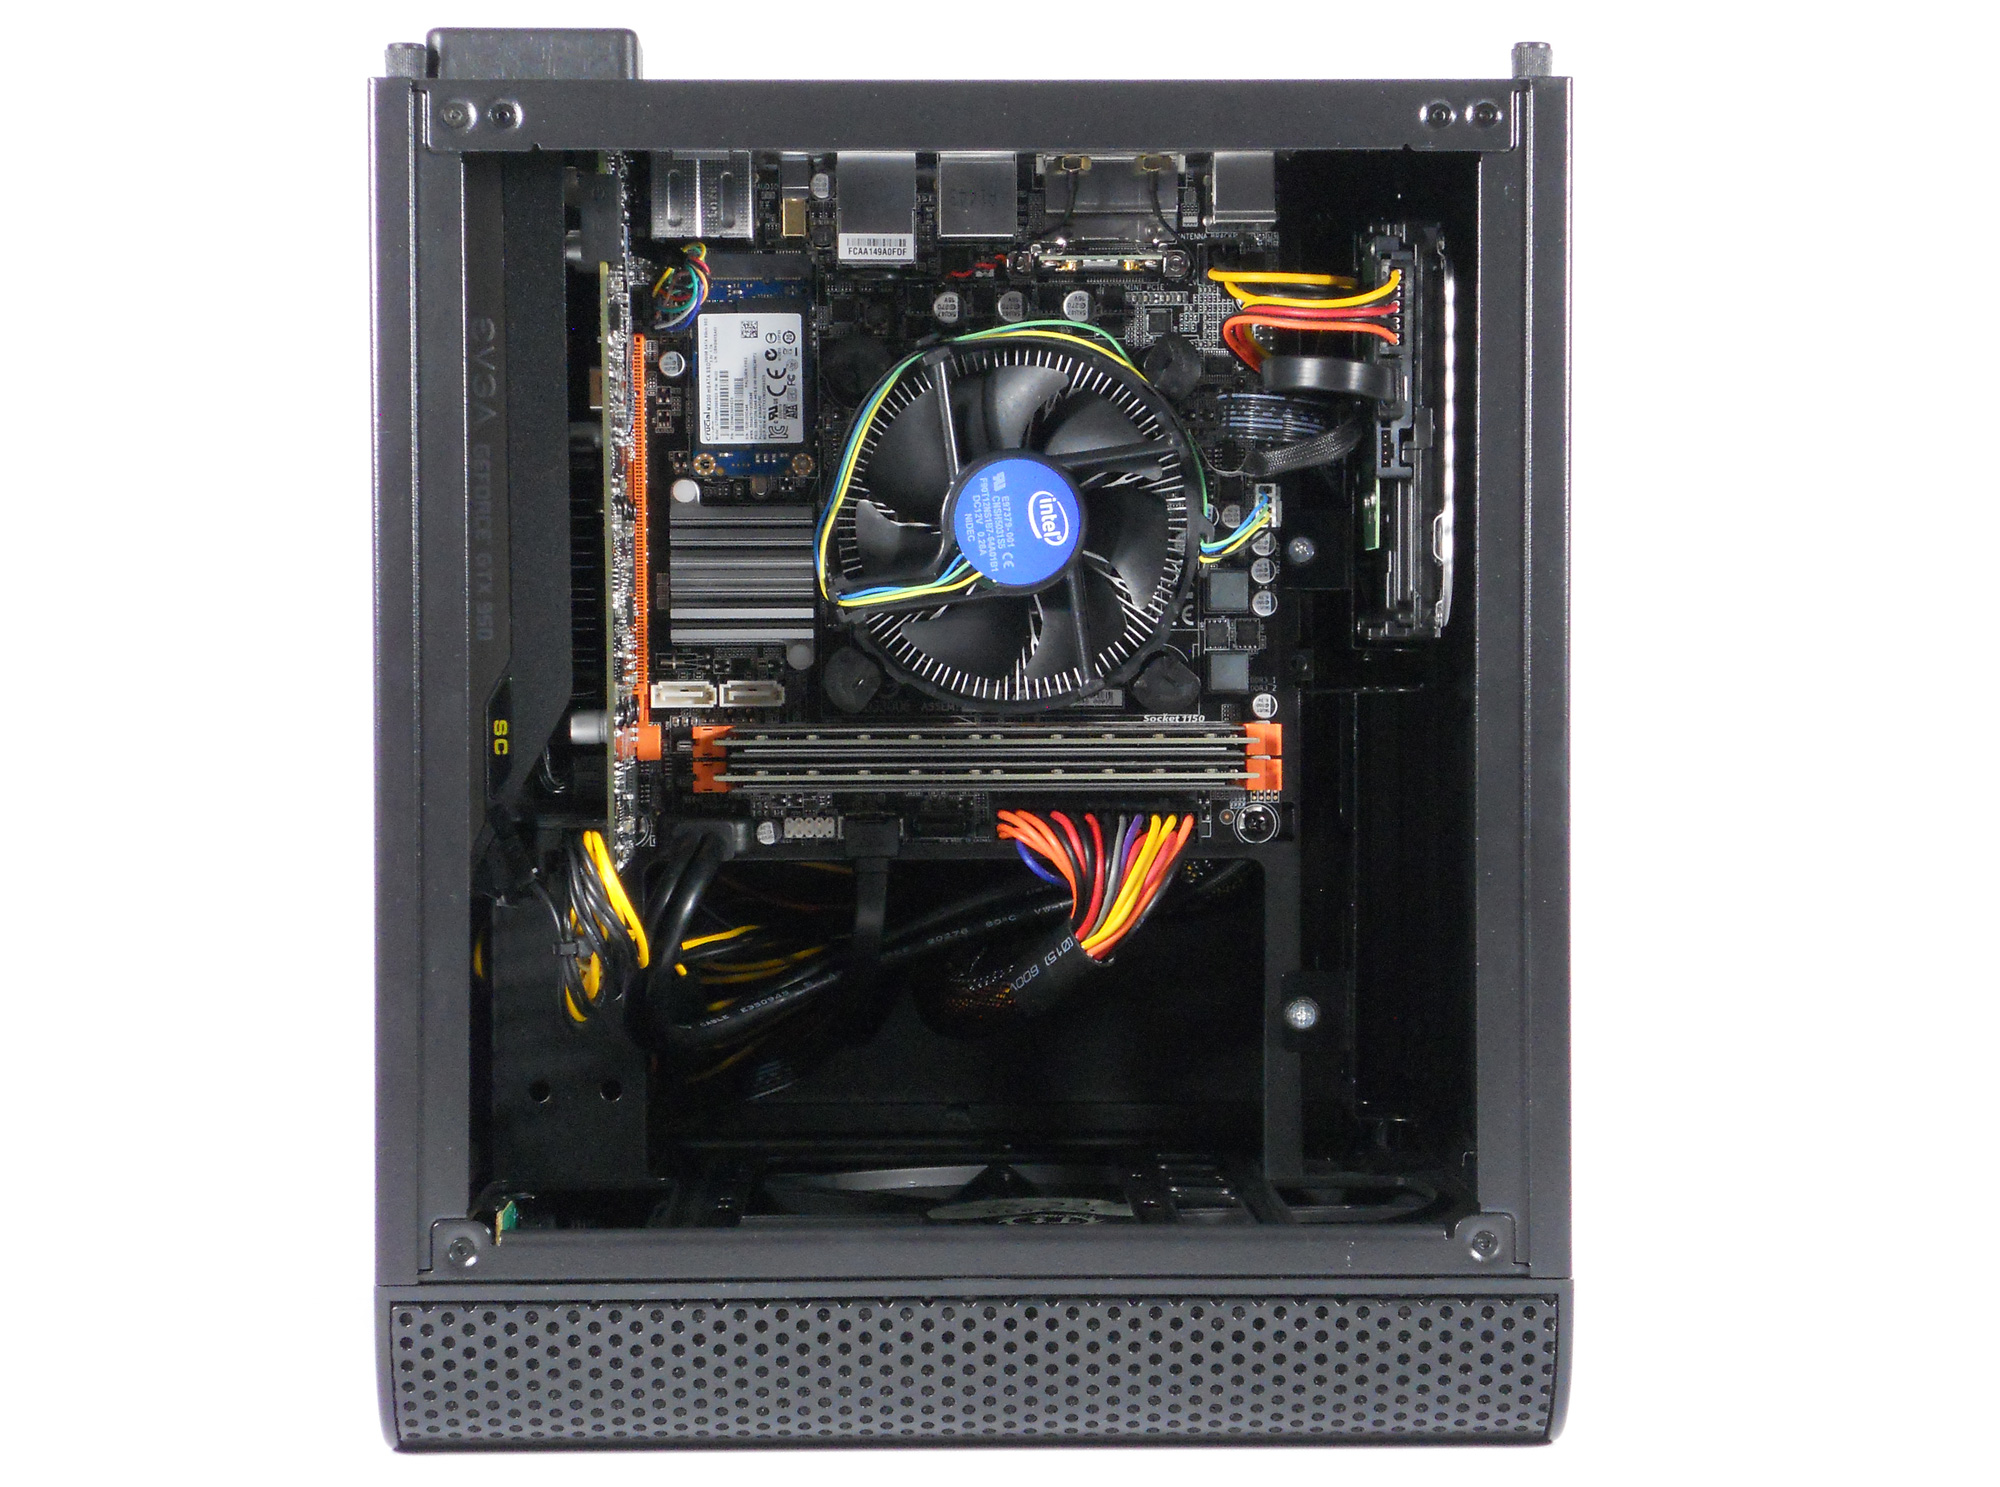
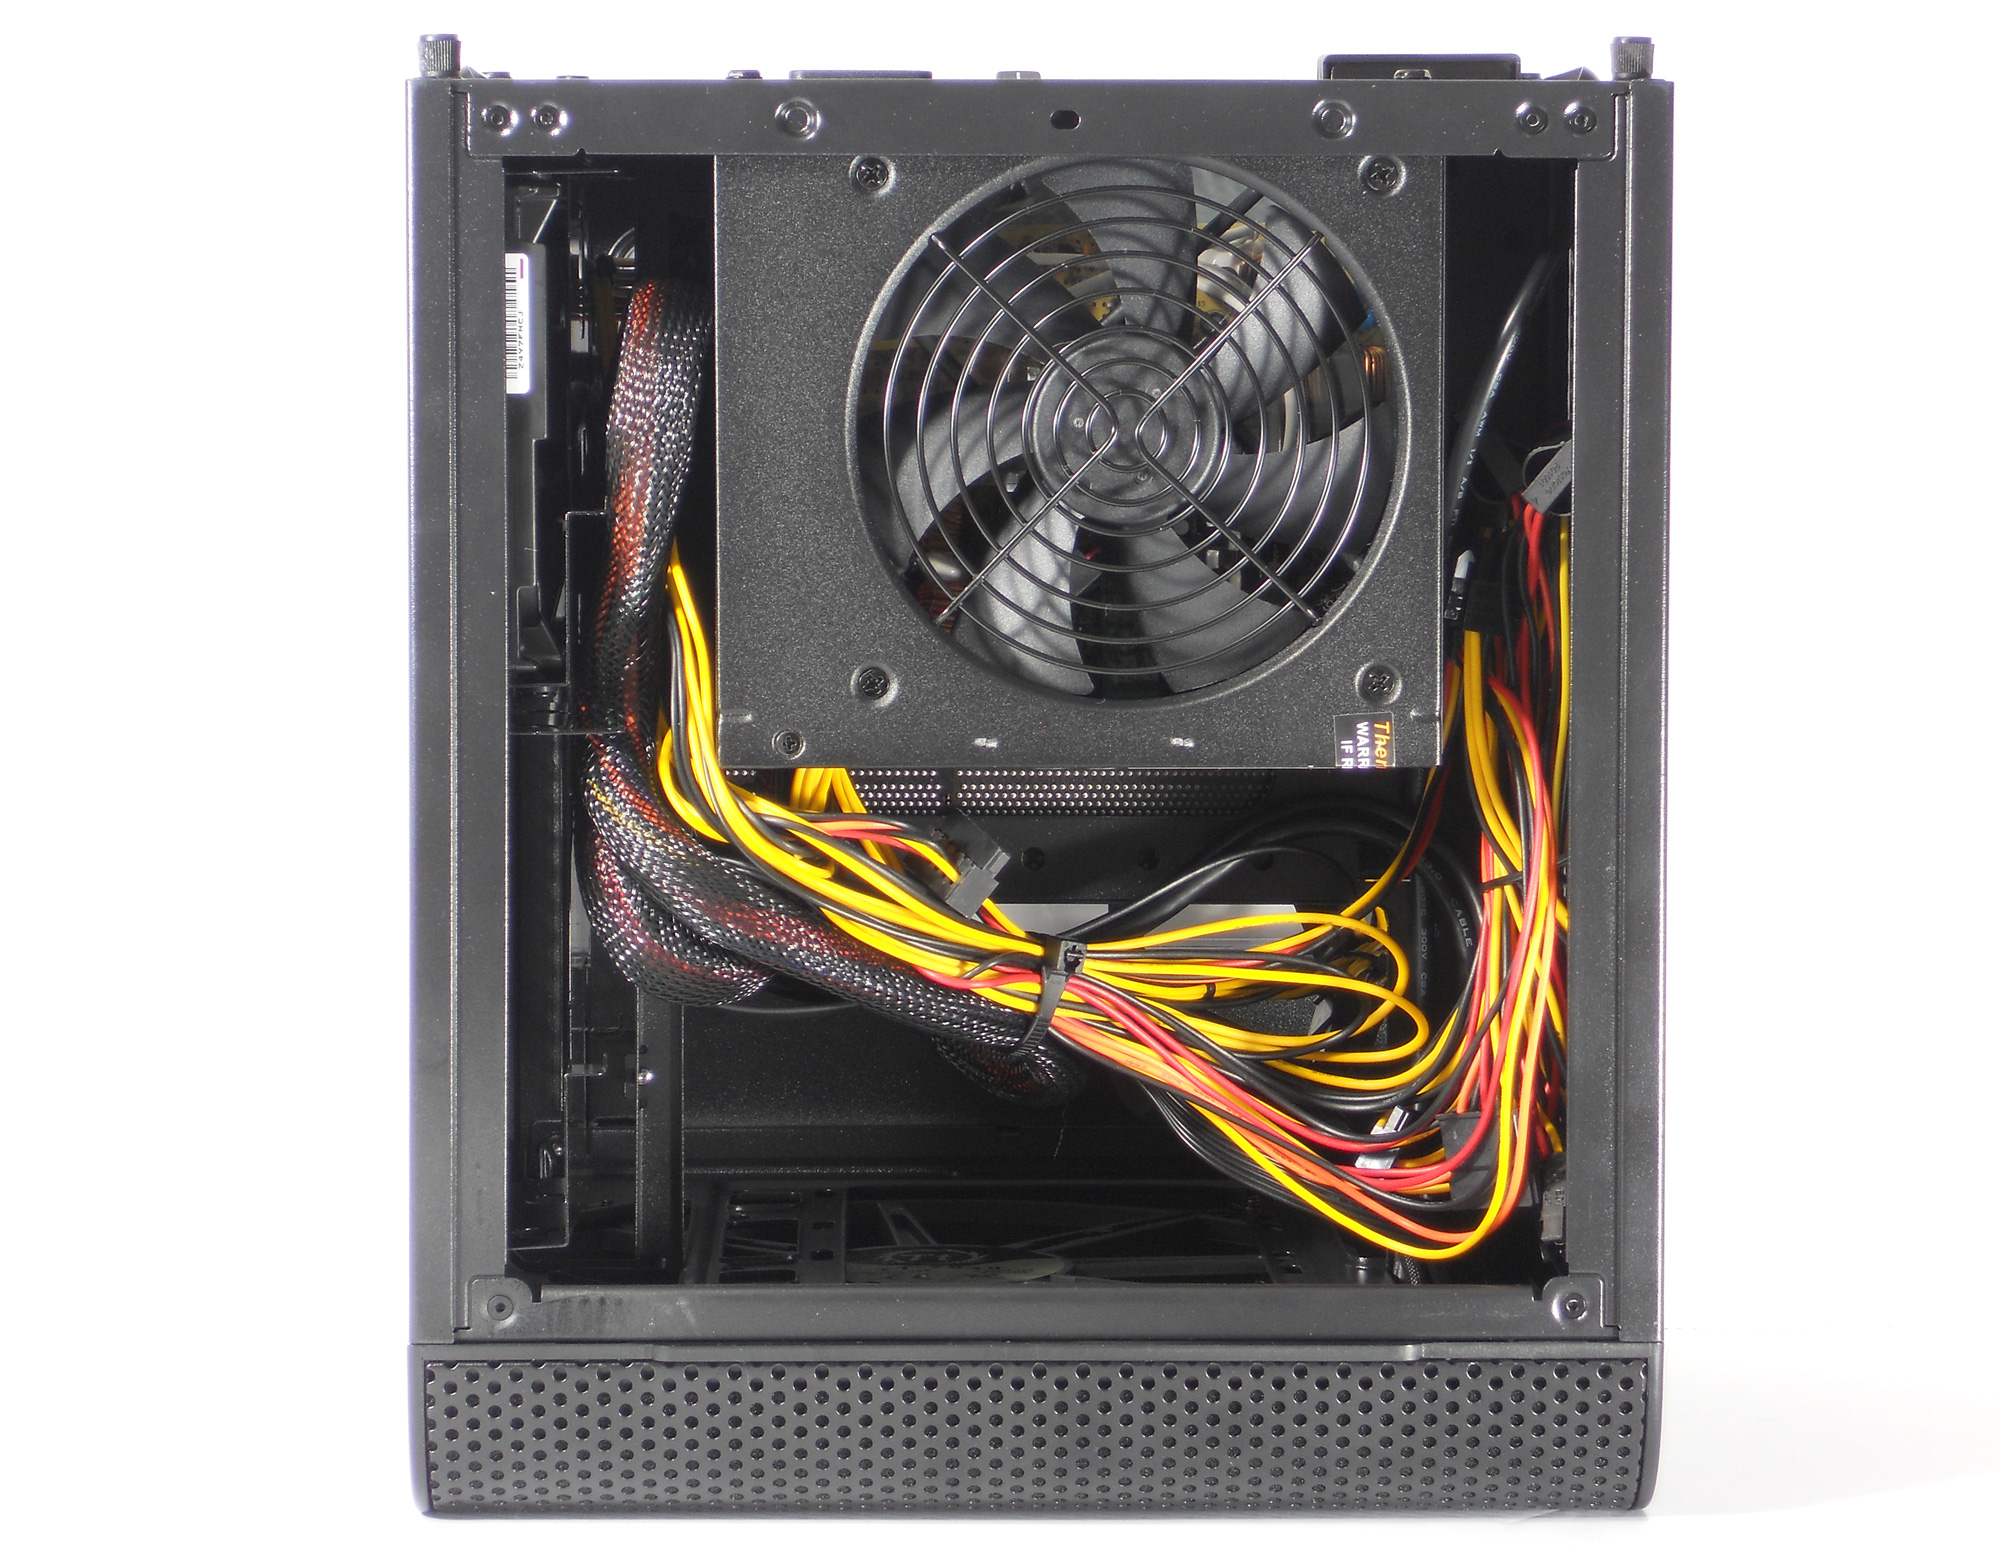
All un-used cables and any extra slack were tucked and cable tied underneath the motherboard tray. one of the two bunches I tied was too big for the included four inch cable ties so I just chucked on one of my own twelve inch ties and called it good. What we are left with is actually something that I wouldn't be embarrassed to show through the top window of the case. And the lighting given off by both the ram and motherboard will both make the hardware in here easier to view.
Now that the builds are done they are both ready to duke it out and see who reigns supreme as a back to school machine.


32 Comments
View All Comments
romrunning - Wednesday, November 4, 2015 - link
Your ThermalTake links are reversed for the PSU and case on the Crucial build.Ryan Smith - Wednesday, November 4, 2015 - link
Good catch. Thank you!Billie Boyd - Friday, November 27, 2015 - link
$800 is still a lot. I recommend seeing CybertronPC Patriot (also seen at http://www.consumerrunner.com/top-10-best-desktops... specially build for hard gamers. One of the top rated and only cost less.Winterblade - Wednesday, November 4, 2015 - link
Very interesting builds for the $800 mark, I really liked the Silverstone form factor but would not hesitate to go with the Crucial option if they sacrifice the optical drive in favor of a better GPU (i.e. GTX 960)extide - Thursday, November 5, 2015 - link
Yeah, I was thinking the same thing, ditch the DVD drive and go to a 960, or maybe like an R9 380.Casecutter - Wednesday, November 4, 2015 - link
Since the Core V1 is designed for VGA with lengths up to 260mm [10.23 in], I would've gone with the PowerColor PCS+ R9 380 2GB (980Mhz/1475Mhz) which is 8.16 inches long. Newegg has that for $145 -AR$20 w/FS.http://www.newegg.com/Product/Product.aspx?Item=N8...
Definitely more BfB and not an issue for that 600W PSU choice.
The_Assimilator - Thursday, November 5, 2015 - link
Hotter and therefore almost certainly noisier.meacupla - Wednesday, November 4, 2015 - link
I recommend taking the dust filter off the GPU side, as it causes that side of the case to trap more heat.In my case, HD7870, it was an extra 5C with the filter on.
tabascosauz - Wednesday, November 4, 2015 - link
Ha! Such impeccable timing.The BX100 is to be succeeded by the BX200. If this build log were to be done with the BX100 off the market, they'd either have to factor in extra cost for the MX200 or absolutely abysmal SSD performance that trumps even the V4 in badness.
Smart, Crucial. That doesn't change your abhorrent excuse of an SSD, found in the one and only BX200.
tabascosauz - Wednesday, November 4, 2015 - link
Whoops, other way around. SS was the one that got lucky. Crucial's build has the MX200.