Gigabyte H77N-WiFi Review – First Look at Ivy Bridge with mITX
by Ian Cutress on November 6, 2012 12:00 PM EST- Posted in
- Motherboards
- Gigabyte
- H77
- mITX
The nature of living beings is to adapt to the surroundings around them – if it is cold, we put on warm clothes, and when it is wet, we tend to seek shelter. When it comes to technology and electronic products, the same can not be said. Innovation is driven by competition, otherwise product lines stagnate. If there was a technological elixir to end all competition, that would be it. By now you are probably wondering what this has to do, if anything, with the BIOS for a motherboard.
Adaptation of the BIOS in the past couple of years has been driven by competition. Before graphical interfaces for the BIOS became the norm, we were greeted with white text on blue screens, or white on black. Now we have a vast array of graphical options at our disposal, and each company is trying to outdo the other.
Initially two companies had the upper hand – both ASUS and ASRock had systems to use multiple colors and mouse movement, making BIOS navigation more intuitive. MSI went a different route and included games in their BIOS as part of a technical exercise to see what was possible. Gigabyte sat back and kept with the old style BIOS. At the time, that meant they were not on the crest of that innovation wave, but I am told by Gigabyte that the reason was due to development of their own BIOS system rather than reskinning an AMI or Phoenix BIOS base code like the other manufacturers. When X79 motherboards were released, Gigabyte showed us the fruit of their endeavors, which ended up being an adapted AMI BIOS rather than a complete rewrite. I was not impressed.
The initial release was slow, bulky, and along with many other reviewers, was baffled by the naming system. Gigabyte called it their ‘3D BIOS Technology’, using 3D to mean 3-dimensional. The majority of users would have been exposed to a 3D environment on their computers, either through games or design. But Gigabyte had construed this terminology to apply to images drawn at an oblique angle. There was noting three-dimensional about it – the user could not navigate from foreground to background (anyone remember playing Tombi/Tomba on PSX?). All we had was an oblique image with clickable parts that gave smaller versions of the advanced BIOS functionality. This 3D BIOS aside, due to the slow and young BIOS which had not had time to develop, we struggled to deal with odd decisions regarding menu allocation (overclocking voltages were several clicks away from the CPU speed adjustment) or fan control terminology. At the time, and since, I made a raft of criticisms and suggestions.
Fast forward almost a year and several things have changed for the better. We can now navigate the Gigabyte BIOS at speed, which is most important. Boot times on certain models can be aggressive, and Gigabyte is opening up more options in the BIOS than before. I love the fact that we can screenshot the BIOS rather than having to photograph the screen (despite some reviewers still miss this feature and get the camera out). We are still stuck with this 3D terminology though, and some odd fan terminology. I have explained to Gigabyte that normal users do not work in PWM values / °C, so I am hoping that will change in the future.
Gigabyte H77N-WiFi BIOS
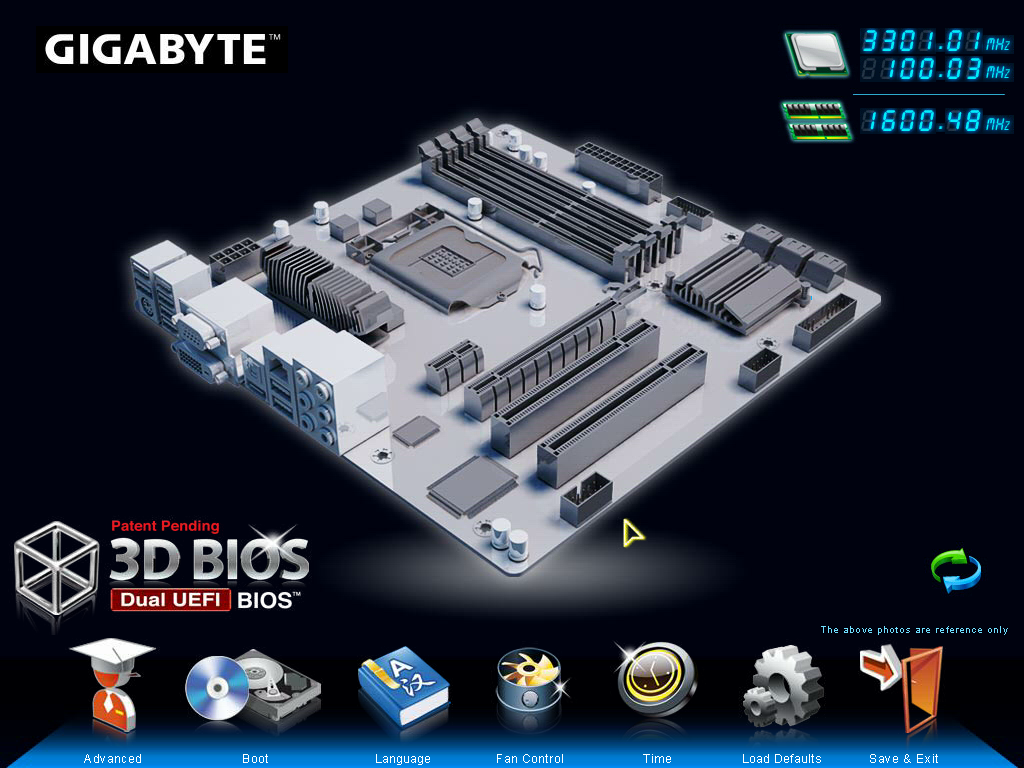
For the H77N-WiFi explicitly, the first odd feature to point out should be the ‘3D’ image used at the front head of the BIOS. Despite the disclaimer that ‘the above photo is for reference only’ we would expect the motherboard to resemble somewhat like the board at hand. For the H77N-WiFi though, we get an image of a micro-ATX board, with the chipset and socket area in different places. Is it that time consuming to put in a mITX image? I fear that this was just an oversight with this BIOS version and should be corrected in the future.
My usual gripes with BIOSes are going to be expressed again, because very few manufacturers seem to take these hints on board (maybe I am not shouting loud enough). Nowhere on this front screen does it tell the user (or system builder, debugger) at least the two main things that should be present on the front screen of ALL BIOSes – the model of the motherboard and the CPU present. This information should be in the face of the user when we enter the BIOS so mistakes are not made with the system we are working with. Alongside this I would also want the current speed of the processor, memory installed (along with module size and memory speed), CPU temperature, chipset temperature, important voltages and fan speeds. If we count the first two requests as the primary detail and the others as secondary detail, what is to stop the primary details being shown on the front screen and the secondary details being shown in a pull out menu when the mouse drifts to the side or corner (like in Windows 8). This is a graphical BIOS – a metaphorical playground to make the experience of owning the product come to life and exciting. I see very few motherboard manufacturers taking advantage of this to the full.
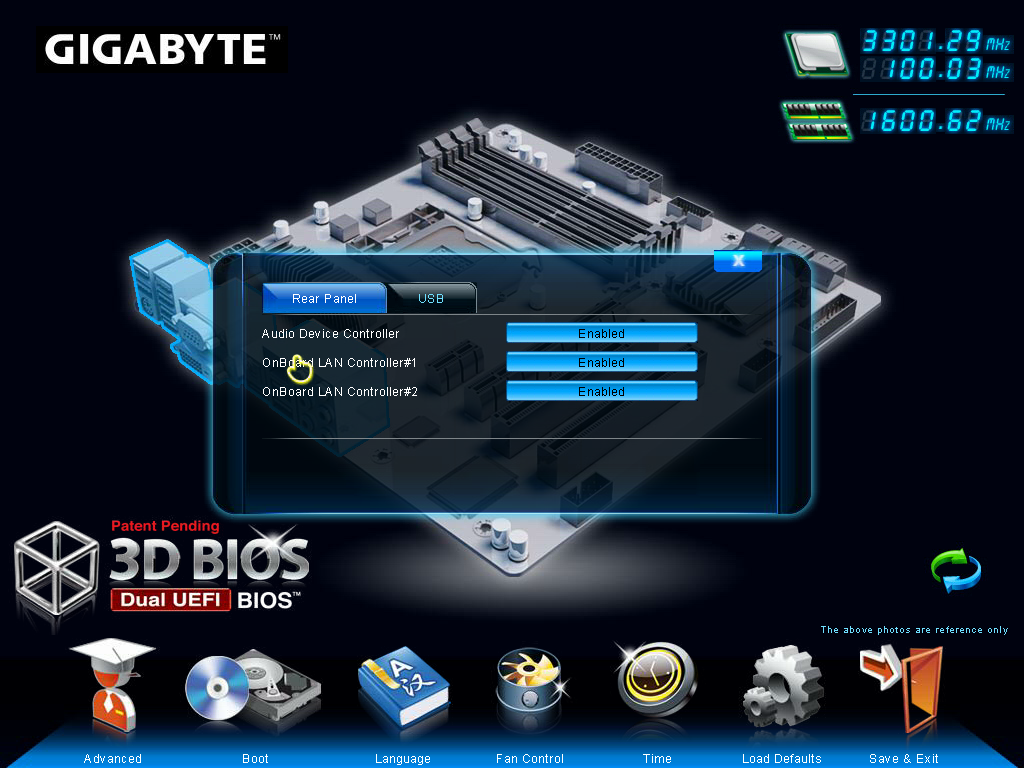
Despite this, the functionality of the H77N-WiFi BIOS is as follows. The main screen gives an image of a generic BIOS of which various areas of the motherboard can be highlighted and clicked, such as the CPU, the memory, the chipset, the SATA ports, the IO panel and so on. When clicked, each area will bring up a limited set of options pertaining to that motherboard section – the rear panel section for example will give options to enable/disable audio and LAN ports as well as USB legacy support. Also available are options to adjust the boot order, change the language, or deal with fan controls. It would be ideal if the areas on the motherboard, when highlighted, gave a small indication of what they are – asking a family member to ‘select the SATA ports’ on the BIOS over the phone is a bit useless if they do not know what a SATA port is. These are small little adjustments that could be made to make the experience smoother.
The bulk of the options are found in the Advanced menu. This opens up into a typical modern day graphical BIOS interface where we have the main options along the top, with options and sub-menus in the main area. The first advanced screen is the ’MIT’ (Motherboard Intelligent Tweaker), where we actually get some details regarding what is onboard – off the bat we have the BIOS version, CPU Frequency, Memory Size and frequency, CPU temperature and some voltages. All that information (along with the motherboard model more importantly) should be in the 3D menu previous.
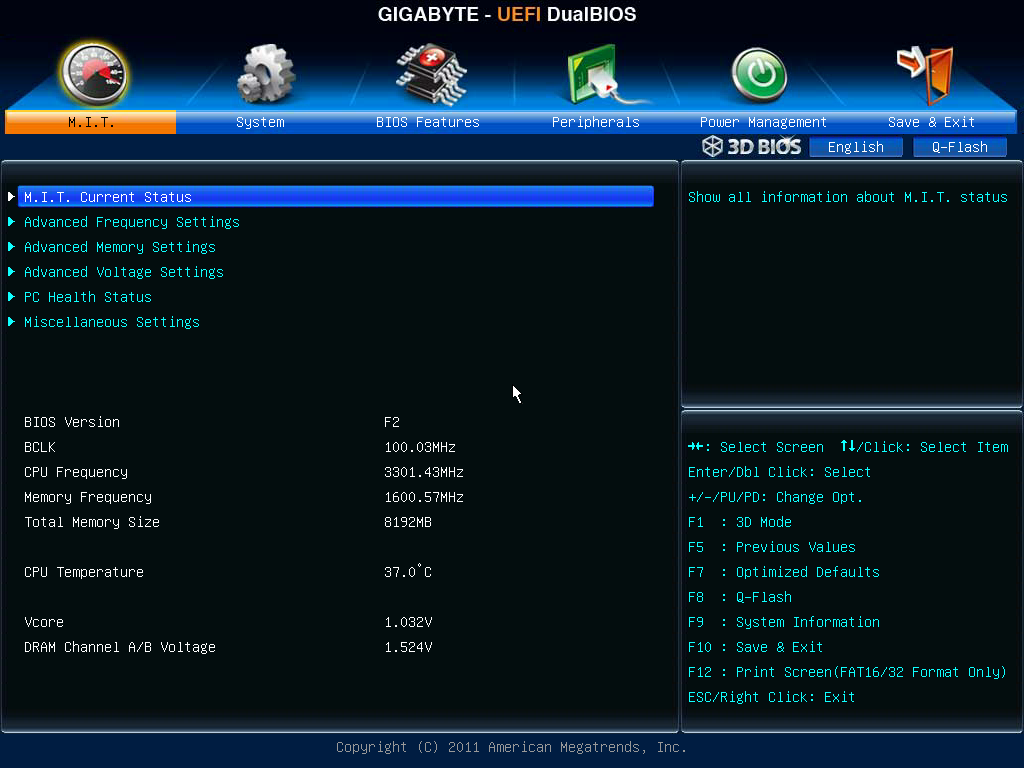
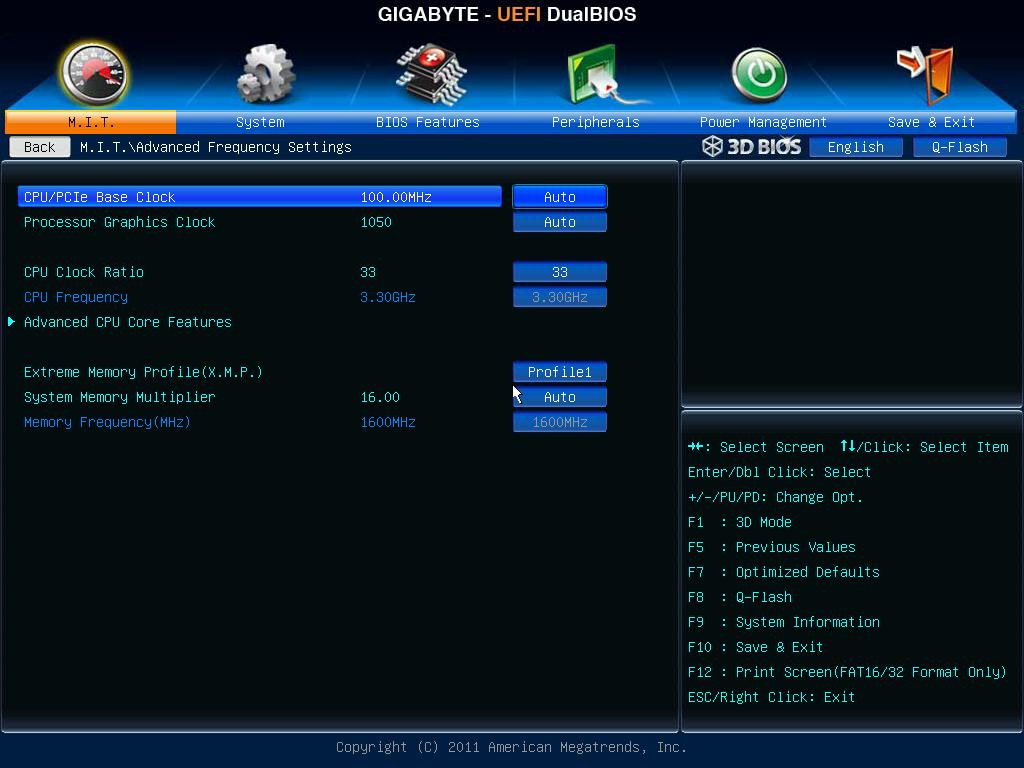
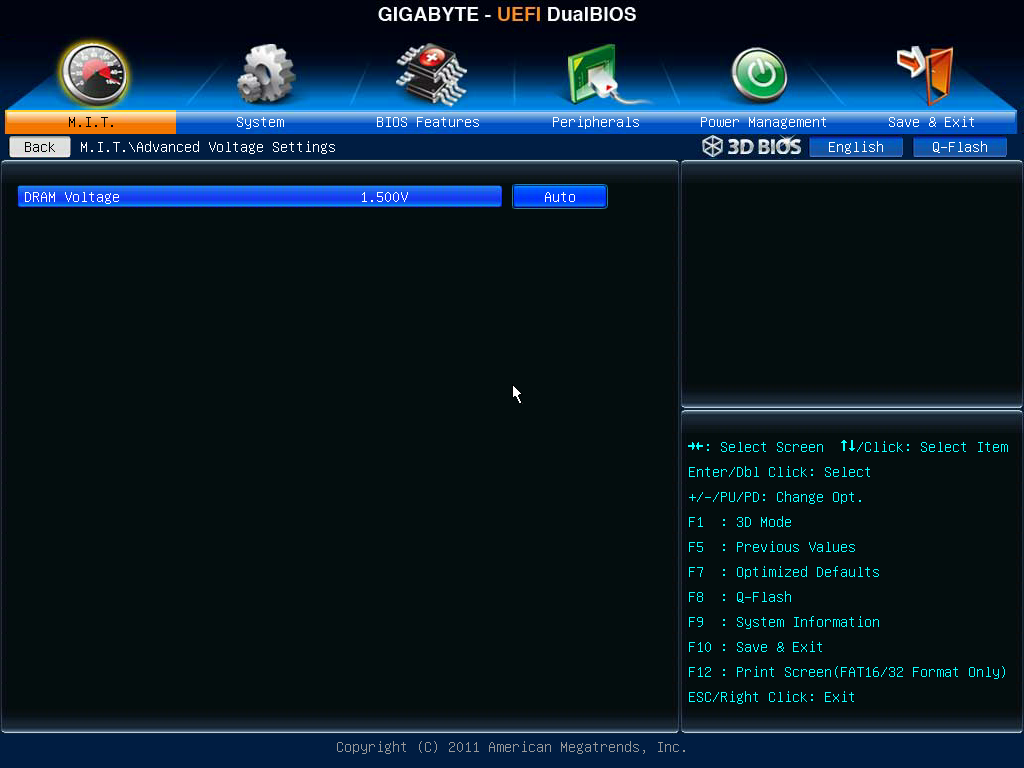
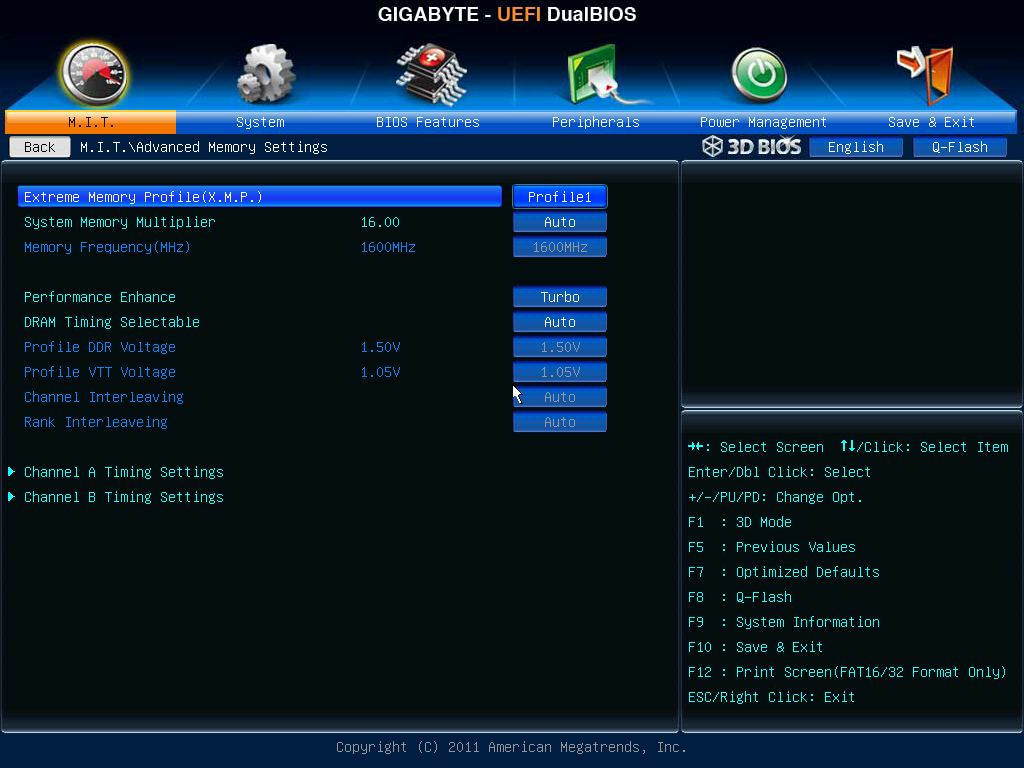
Various sub-menus can be spawned from the MIT menu. We can select ‘Current Status’ to give a more detailed rundown of the CPU and memory; the frequency settings which can adjust the speed of the processor (only below the rated speed on an H77 by multiplier but BCLK can be adjusted up), memory (max 1600 MHz) and IGP. We also have the advanced memory settings sub-menu where XMP and sub-timing adjustments can be made. The advanced voltage settings offer only the memory voltage to adjust, so do note that the H77N-WiFi does not allow down-clocking. Finally the ‘PC Health’ sub-menu which gives voltages, temperatures, fan speeds, and the fan speed control which gives options in PWM values / °C.
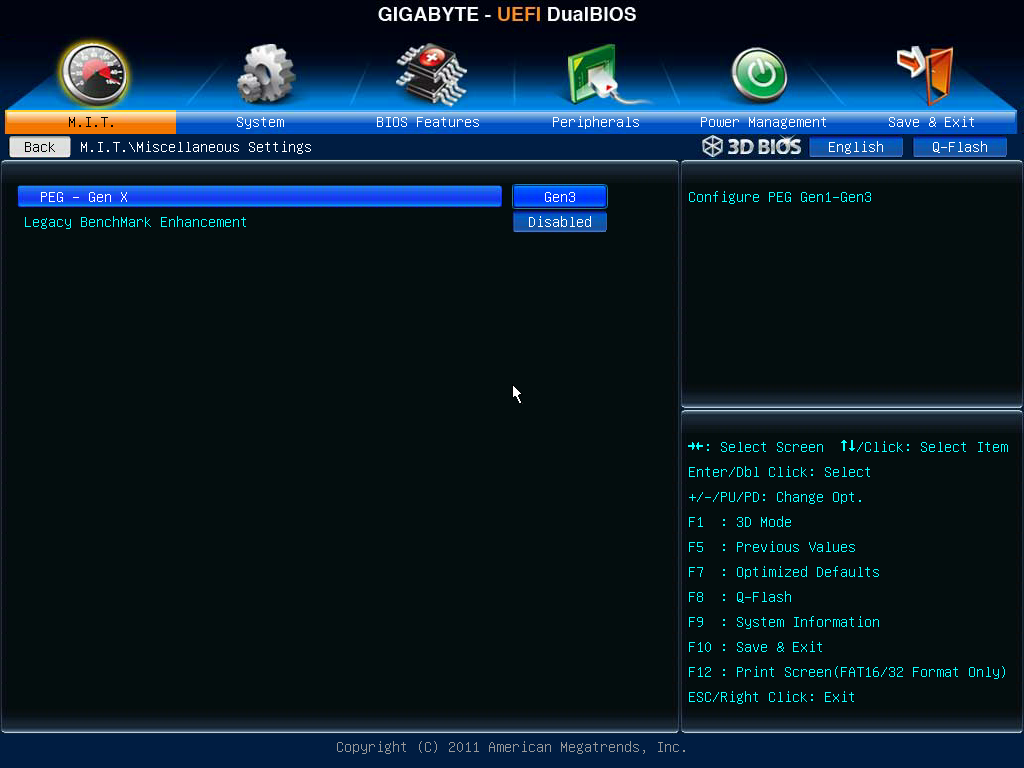
An important menu to consider is the final sub-menu ‘Miscellaneous’ settings. Here we have two options – one for legacy benchmark enhancement (an odd option to include for overclockers on a non-overclocking motherboard) and the other to adjust the PCIe slot bandwidth. When the system was left on auto, I had trouble getting any of my graphics cards to run at the full 16x lanes – I initially thought it was some clever down clocking, but it never seemed to come back up and use the full 16 lanes at PCIe 3.0 for a 7970 for example. By navigating to this menu and adjusting the option to Gen3, the graphics sub-system never faulted and we got accurate benchmark results. If this is a BIOS issue rather than individual issues, I hope it is fixed after F2.
Elsewhere in the BIOS is our standard array of BIOS Features (Boot options, Logo on Boot), Peripherals (to enable controllers, change SATA mode), and boot override system.


52 Comments
View All Comments
457R4LDR34DKN07 - Tuesday, November 6, 2012 - link
Zotac Z77 A-E is vastly superior. It is the only mITX Z77 that has a mSATA. You could even remove the wifi/bt module and put in a mpci-e tv tuner and use the antenna.K-thiraband-com - Tuesday, November 6, 2012 - link
The ASRock Z77E-ITX also has mSATA.http://www.newegg.com/Product/Product.aspx?Item=N8...
RicardoNeuer - Thursday, November 8, 2012 - link
just as Eddie implied I'm startled that some one can earn $9332 in a few weeks on the internet. have you seen this(Click on menu Home more information)http://goo.gl/lbKGT
cjs150 - Tuesday, November 6, 2012 - link
I have the ASrock z77 E-ITX which is a lovely mini itx board and has a MSata on the back. Admittedly only SATA2 (like all MSata sockets at moment).Go for the samsung green low profile memory (fantastic overclocking potential) and there is no need to worry about CPU coolers interfering with memory heat spreaders.
What I would really like is for MB makers to put the ATX socket at right angles to the board, it would make cable management much easier, and that is always a problem in Mini ITX cases.
The Gigabyte board is a lot cheaper than my ASrock board, but I would not change it.
philipma1957 - Tuesday, November 6, 2012 - link
there are 3 itx mobos and I own 2 of them I have the truly great ASrockz77 E-ITX with a msata under the board I have a crucial 256gb in it.I also own an intel BoxDH77DF
http://www.newegg.com/Product/Product.aspx?Item=N8...
Which allows this:
1 x PCI Express Full-/Half-Mini Card slot with support for mSATA .
my build has a crucial msata in it also the 256gb size.
frankly I won't buy anyboard that does not have a msata option/
looking at this board you may be able to run a msata instead of the wifi.
frankly if you go itx msata is a godsend for space and wire management
PEJUman - Tuesday, November 6, 2012 - link
I have the asus H77 ITX, with 3770 + 2 x 2.5" SSDs + 2 x 3.5" Velociraptors with icepack. all inside a antec ISK 65, which is powered with 150W dell power brick to get around the 65 limit.I did have to modify the ISK removable frame brace to mount the 2 x 3.5" velociraptors, but there is enough airflow with 2 x 80mm + some clever ducting using a thin piece of flexible plastic to keep everything cool under load (prime + crystal diskmark): 85 C CPU & 45 C on raptors.
it's it very tight, but that is half of the fun on building PCs;
where is the challange on building mini HTPC with mSATA hehehe =P.
The reason I picked the asus board is for the 6 SATAs, when it becomes obsolete, it would serve a a power efficient, cost efective file server.
Samus - Wednesday, November 7, 2012 - link
I think most people would prefer an Asus, Gigabyte, Asrock, etc over a Zotac. The only reason to ever buy Zotac products in the past was for the nVidia ION options they provided when nobody else did. These days, Zotac is less innovative and quality/support have always been lacking, so why would you even consider them when there are higher quality, similarly priced competing products?rafa333 - Friday, December 7, 2012 - link
you are sow dirty assabrogan - Friday, December 7, 2012 - link
The Zotac board uses thin steel "threads" to mount the wifi antennas. This is a very poor design. After receiving one already broken in the box, and after examining the proper way to do it (the gigabyte uses a folded plate), I won't purchase a Zotac again.GoodBytes - Tuesday, November 6, 2012 - link
On the POST performance table, I don't understand whats the difference between stripped and default. Can someone please explain it to me? I can't seam to find any info on this on the review. Thanks.