The Corsair RM850x (2018) PSU Review: Exceptional Electrical Performance
by E. Fylladitakis on August 22, 2018 8:00 AM EST- Posted in
- Cases/Cooling/PSUs
- Corsair
- PSUs
- 850W
- Modular
External Appearance
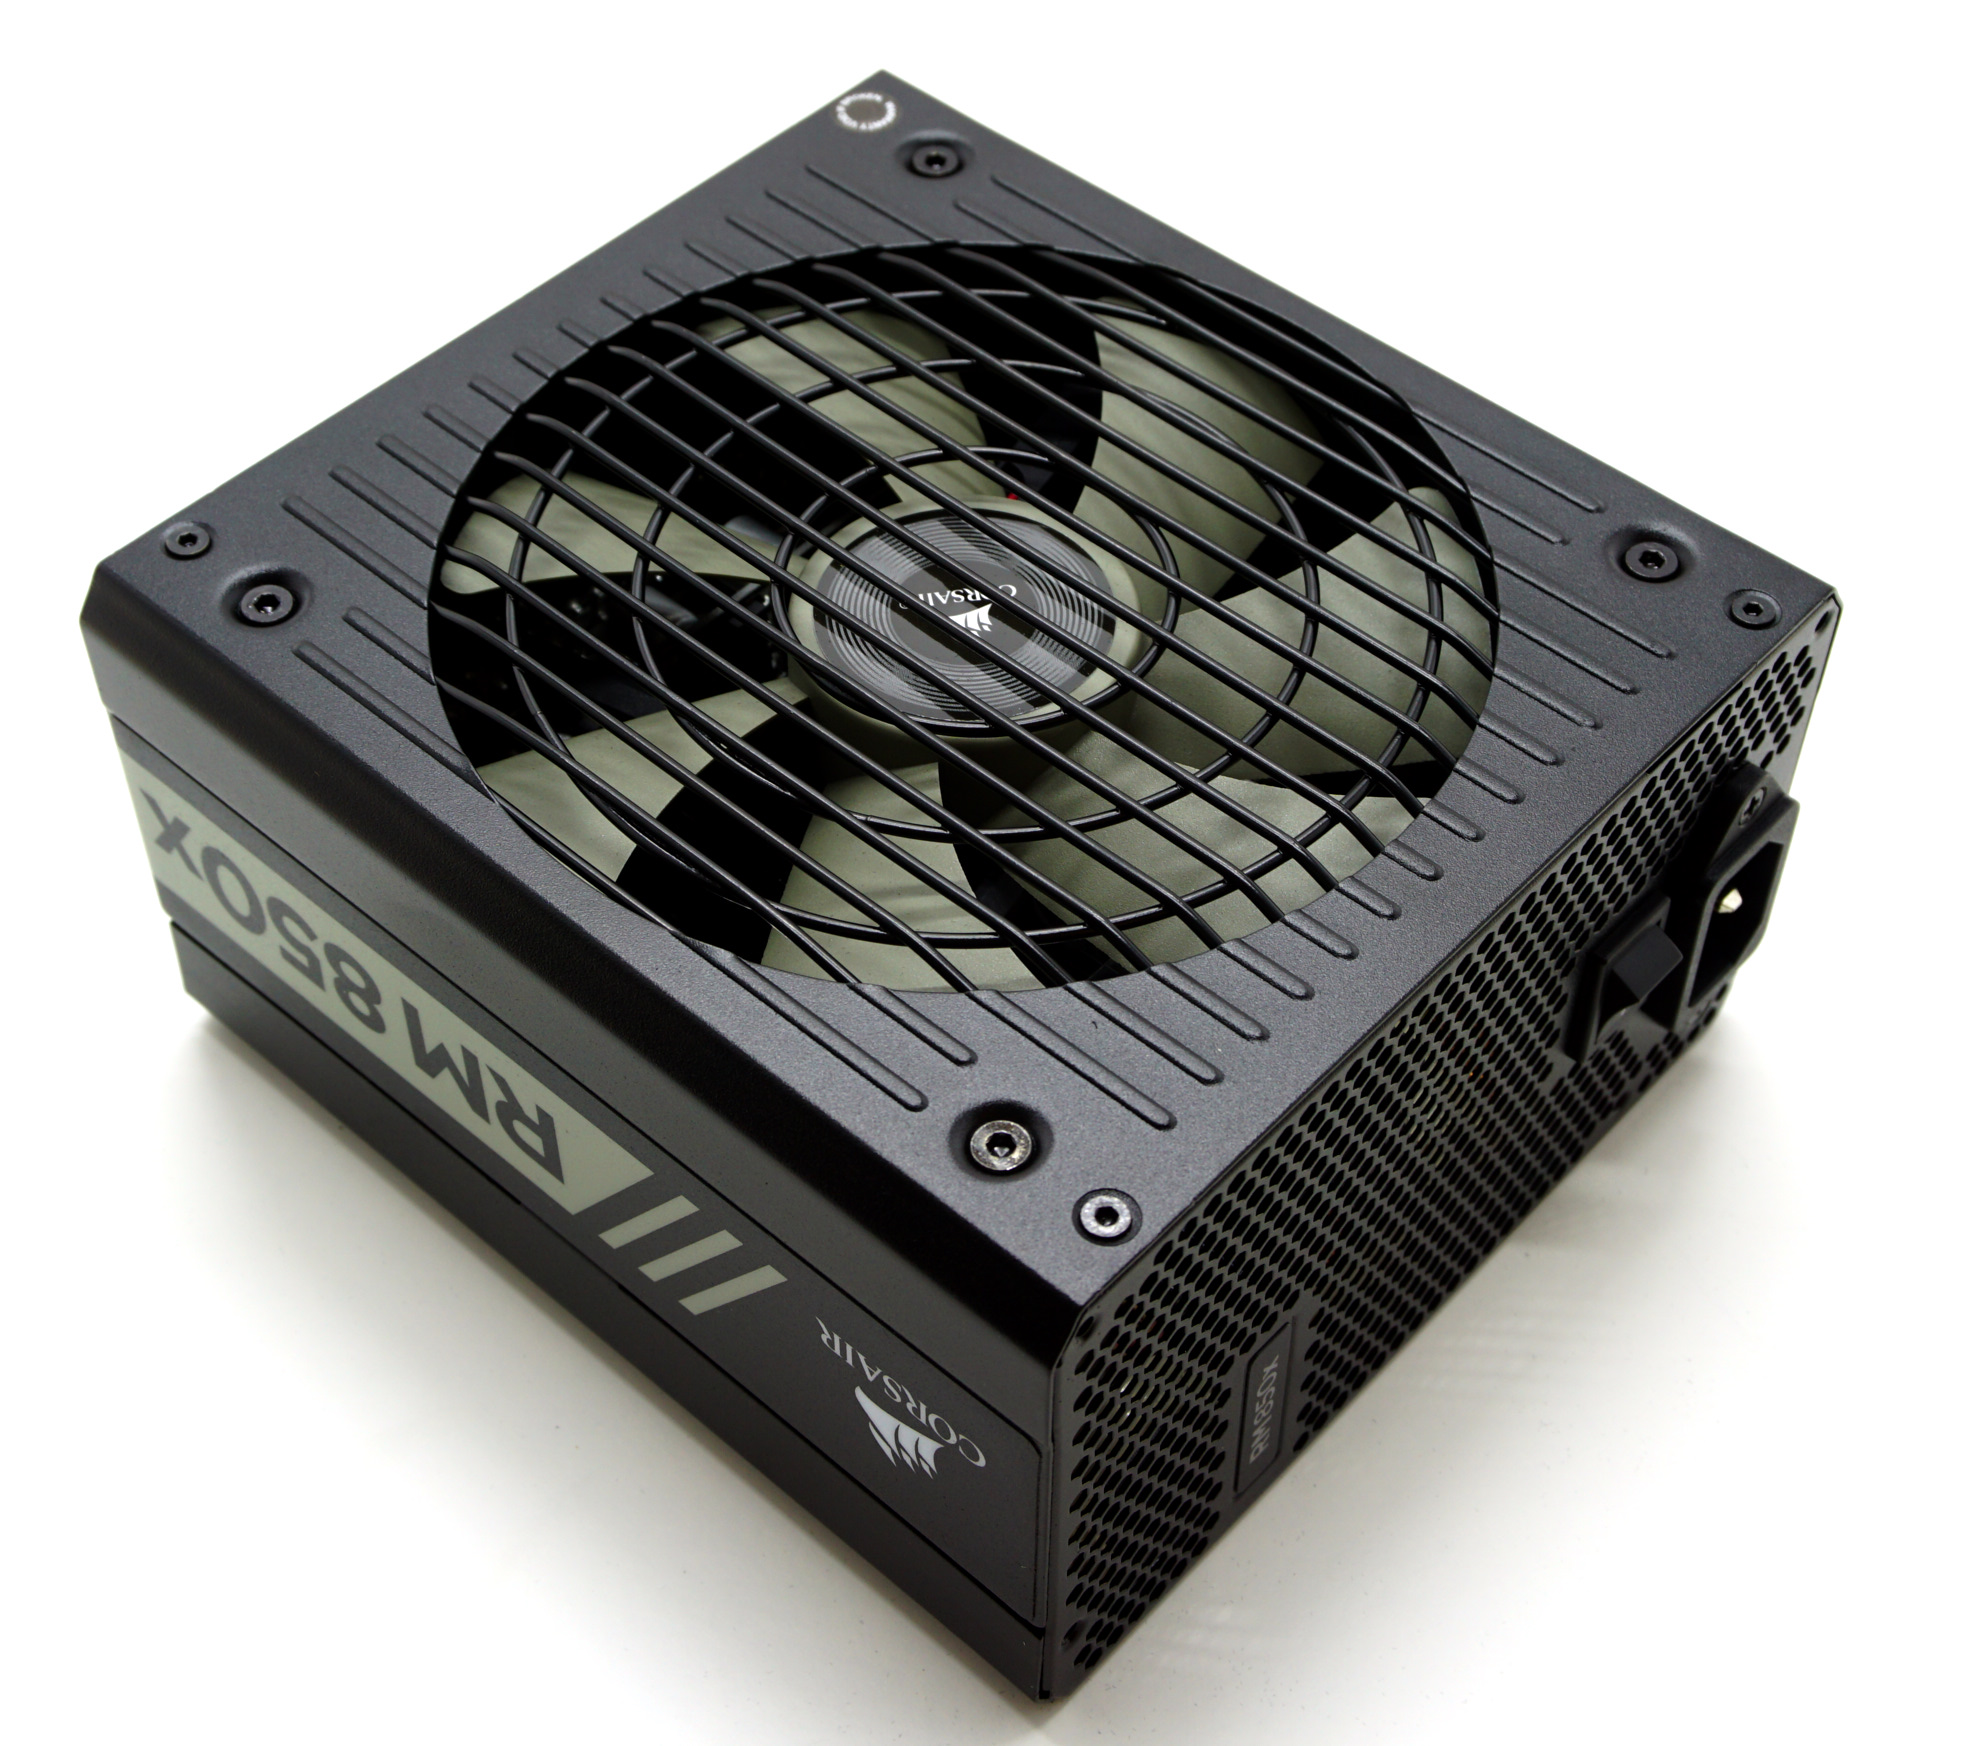
The new revision of the RM series is proportionally and aesthetically identical to the unit it replaces, with the only exception being the stickers. Corsair has been using the same chassis with the chamfered edges for nearly all of their advanced PSUs. Satin black paint covers the chassis and the designer went with neutral colors on the stickers as well, forming a classy design. Further aesthetic improvements include embossed parallel ridges aligned with the fan’s finger guard wires and a small badge with the unit’s model at the rear side of the chassis. The chassis has been shortened in comparison to the previous version and now is 160 mm long, which is just slightly more than the length of a standard ATX PSU. This is unlikely to be an issue with any modern advanced ATX case but users should be careful with low-cost and atypical case designs.
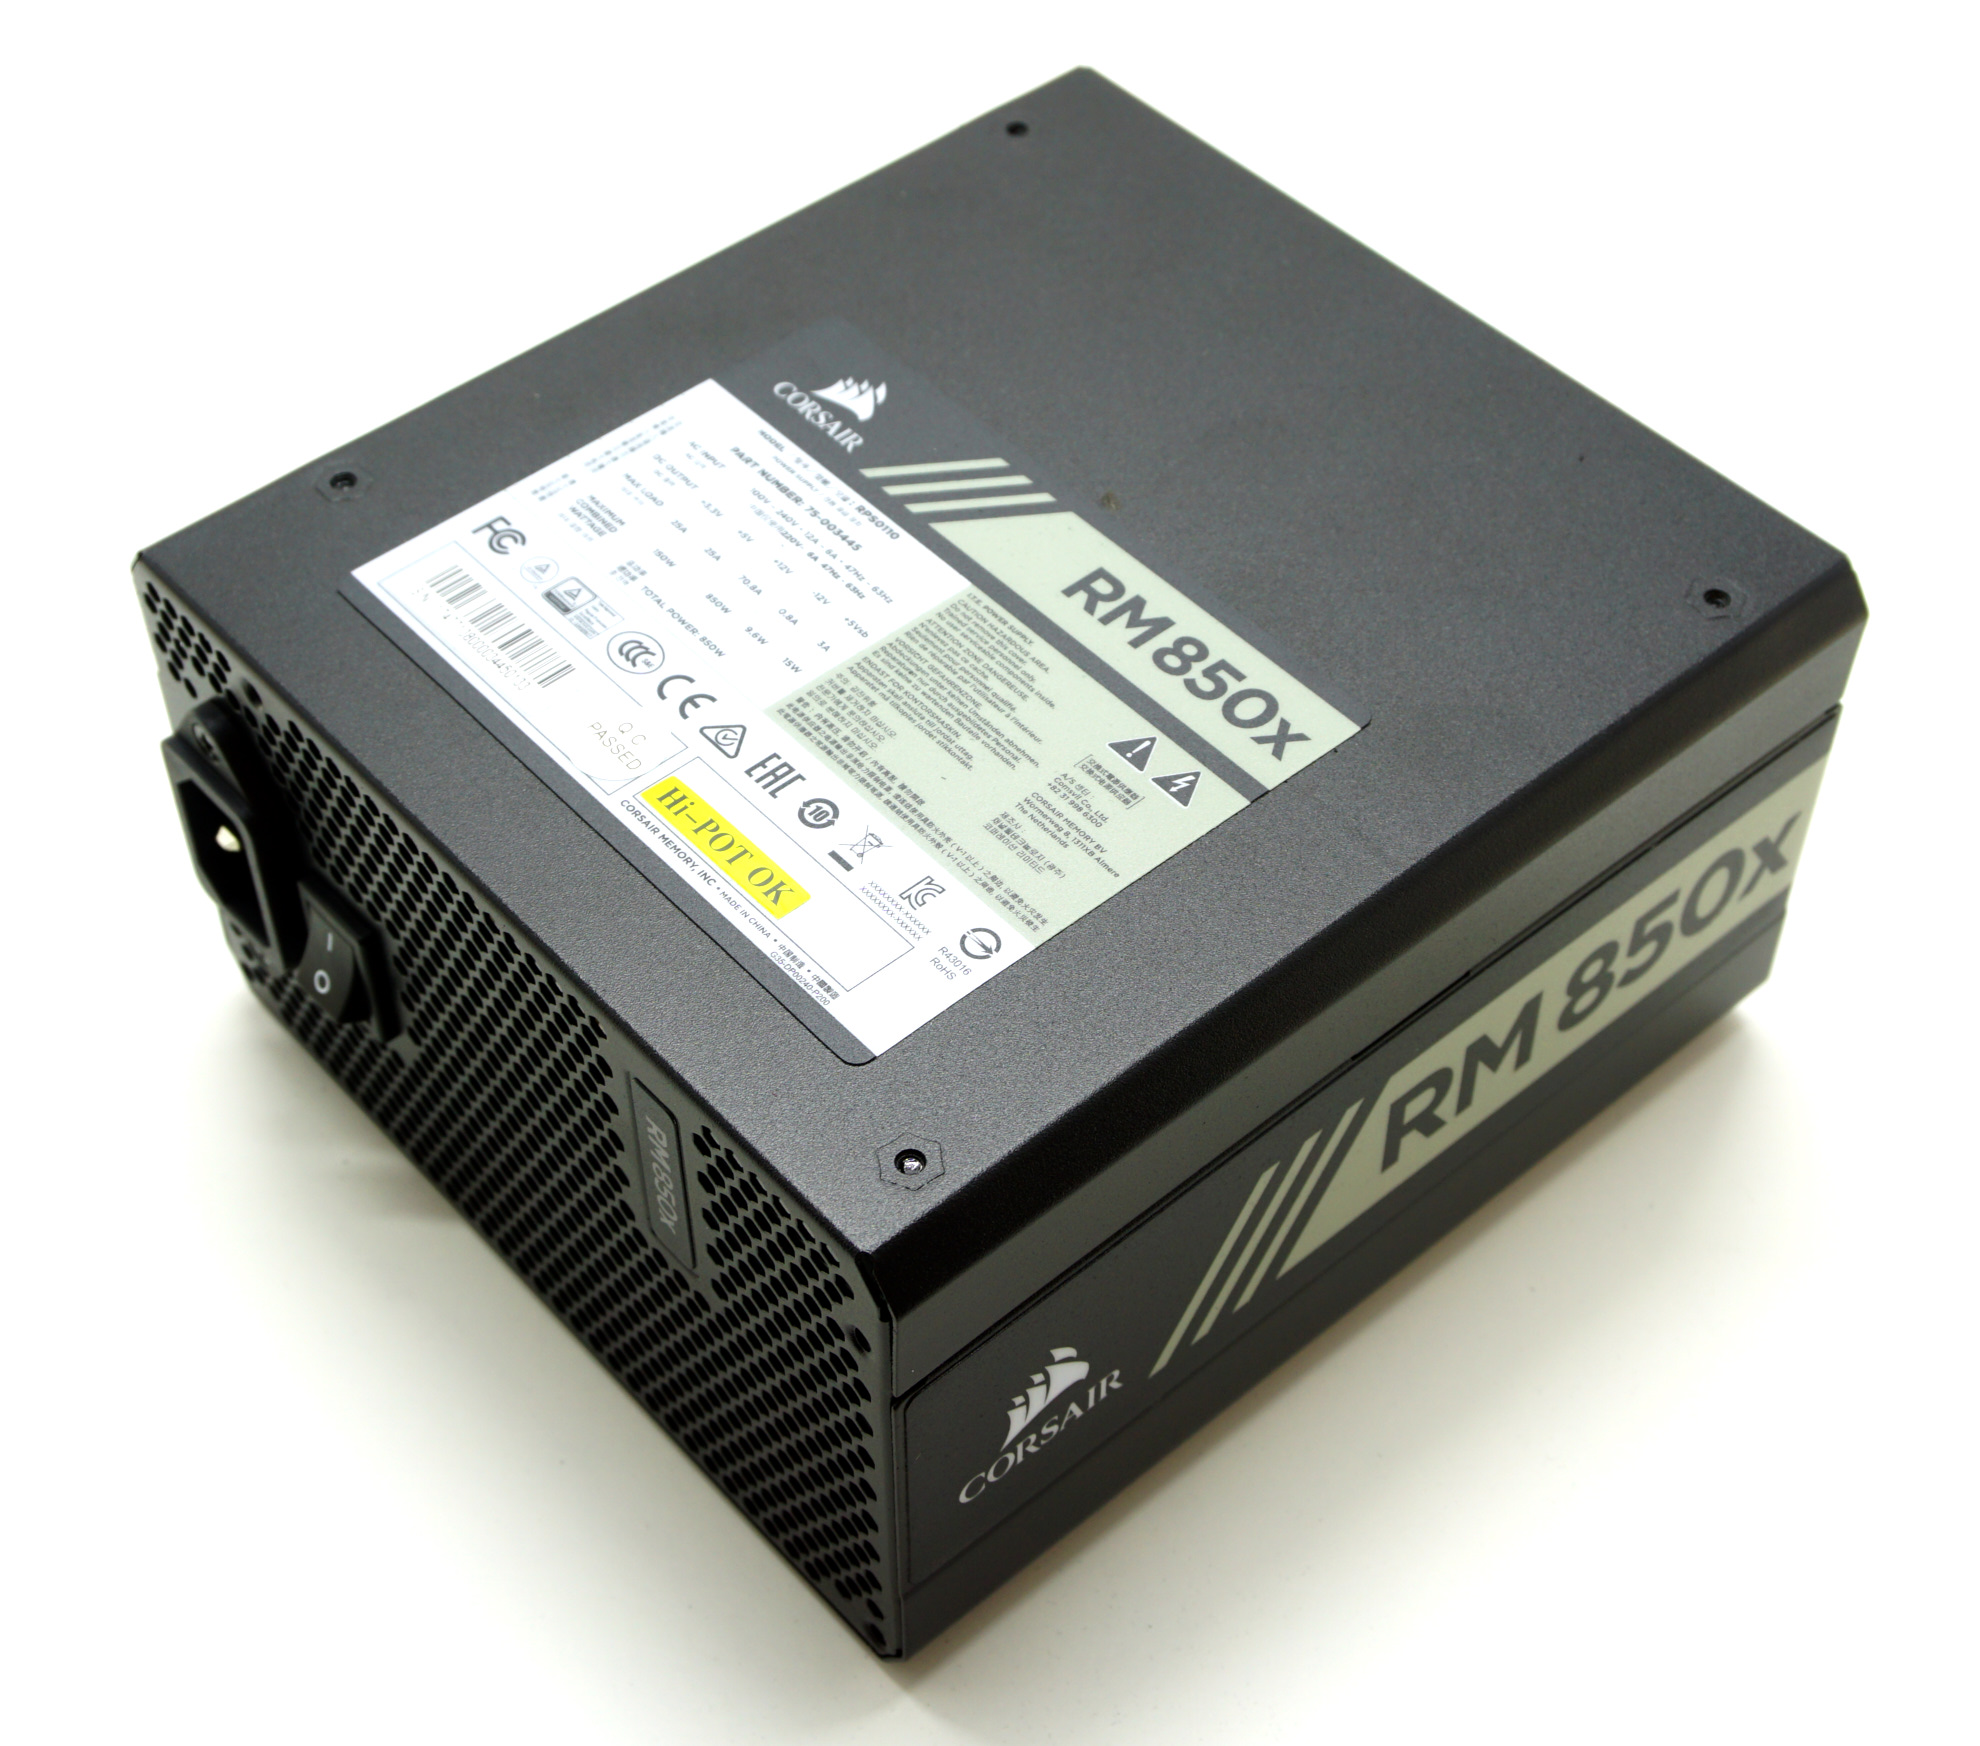
We find the sticker with the unit's specifications and certifications at the top of the chassis. It is possible for the user to choose whether to hide the sticker or not by choosing whether to install the RM850x with its fan facing upwards or downwards. The side sticker are also installed in such a way so that the sticker facing the left case panel will always be upright. However, the sticker facing the right panel will always be upside down. Typical cases very rarely have a transparent right panel but this could be a problem for custom designs. Still, an advanced user hypothetically can remove and reinstall the side stickers without voiding the unit’s warranty, as the warranty sticker is placed on one of the unit's screws. However, keeping the sticker in pristine condition while removing it could prove to be a challenge.

There is little of interest at the rear side of the chassis. Besides from the typical AC cord receptacle and the small on/off switch, we can only see a small badge with the unit's model printed on it. Moving to the front of the chassis, we find it littered with the numerous connectors for the modular cables. The large 24-pin ATX cable is split between two connectors. For the rest of the cables, there essentially are two connector groups: one for PCIe/CPU 12V 8-pin connectors and one for SATA/Molex 6-pin connectors. Both PCIe and CPU 12V cables can be inserted into any of the 8-pin connectors. The layout is a bit strange though, with one of the PCIe/CPU 12V 8-pin connectors placed amongst the 6-pin connectors, as the designer apparently figured that this is the most efficient way to organize the connectors on the vertical board.

Internal Design
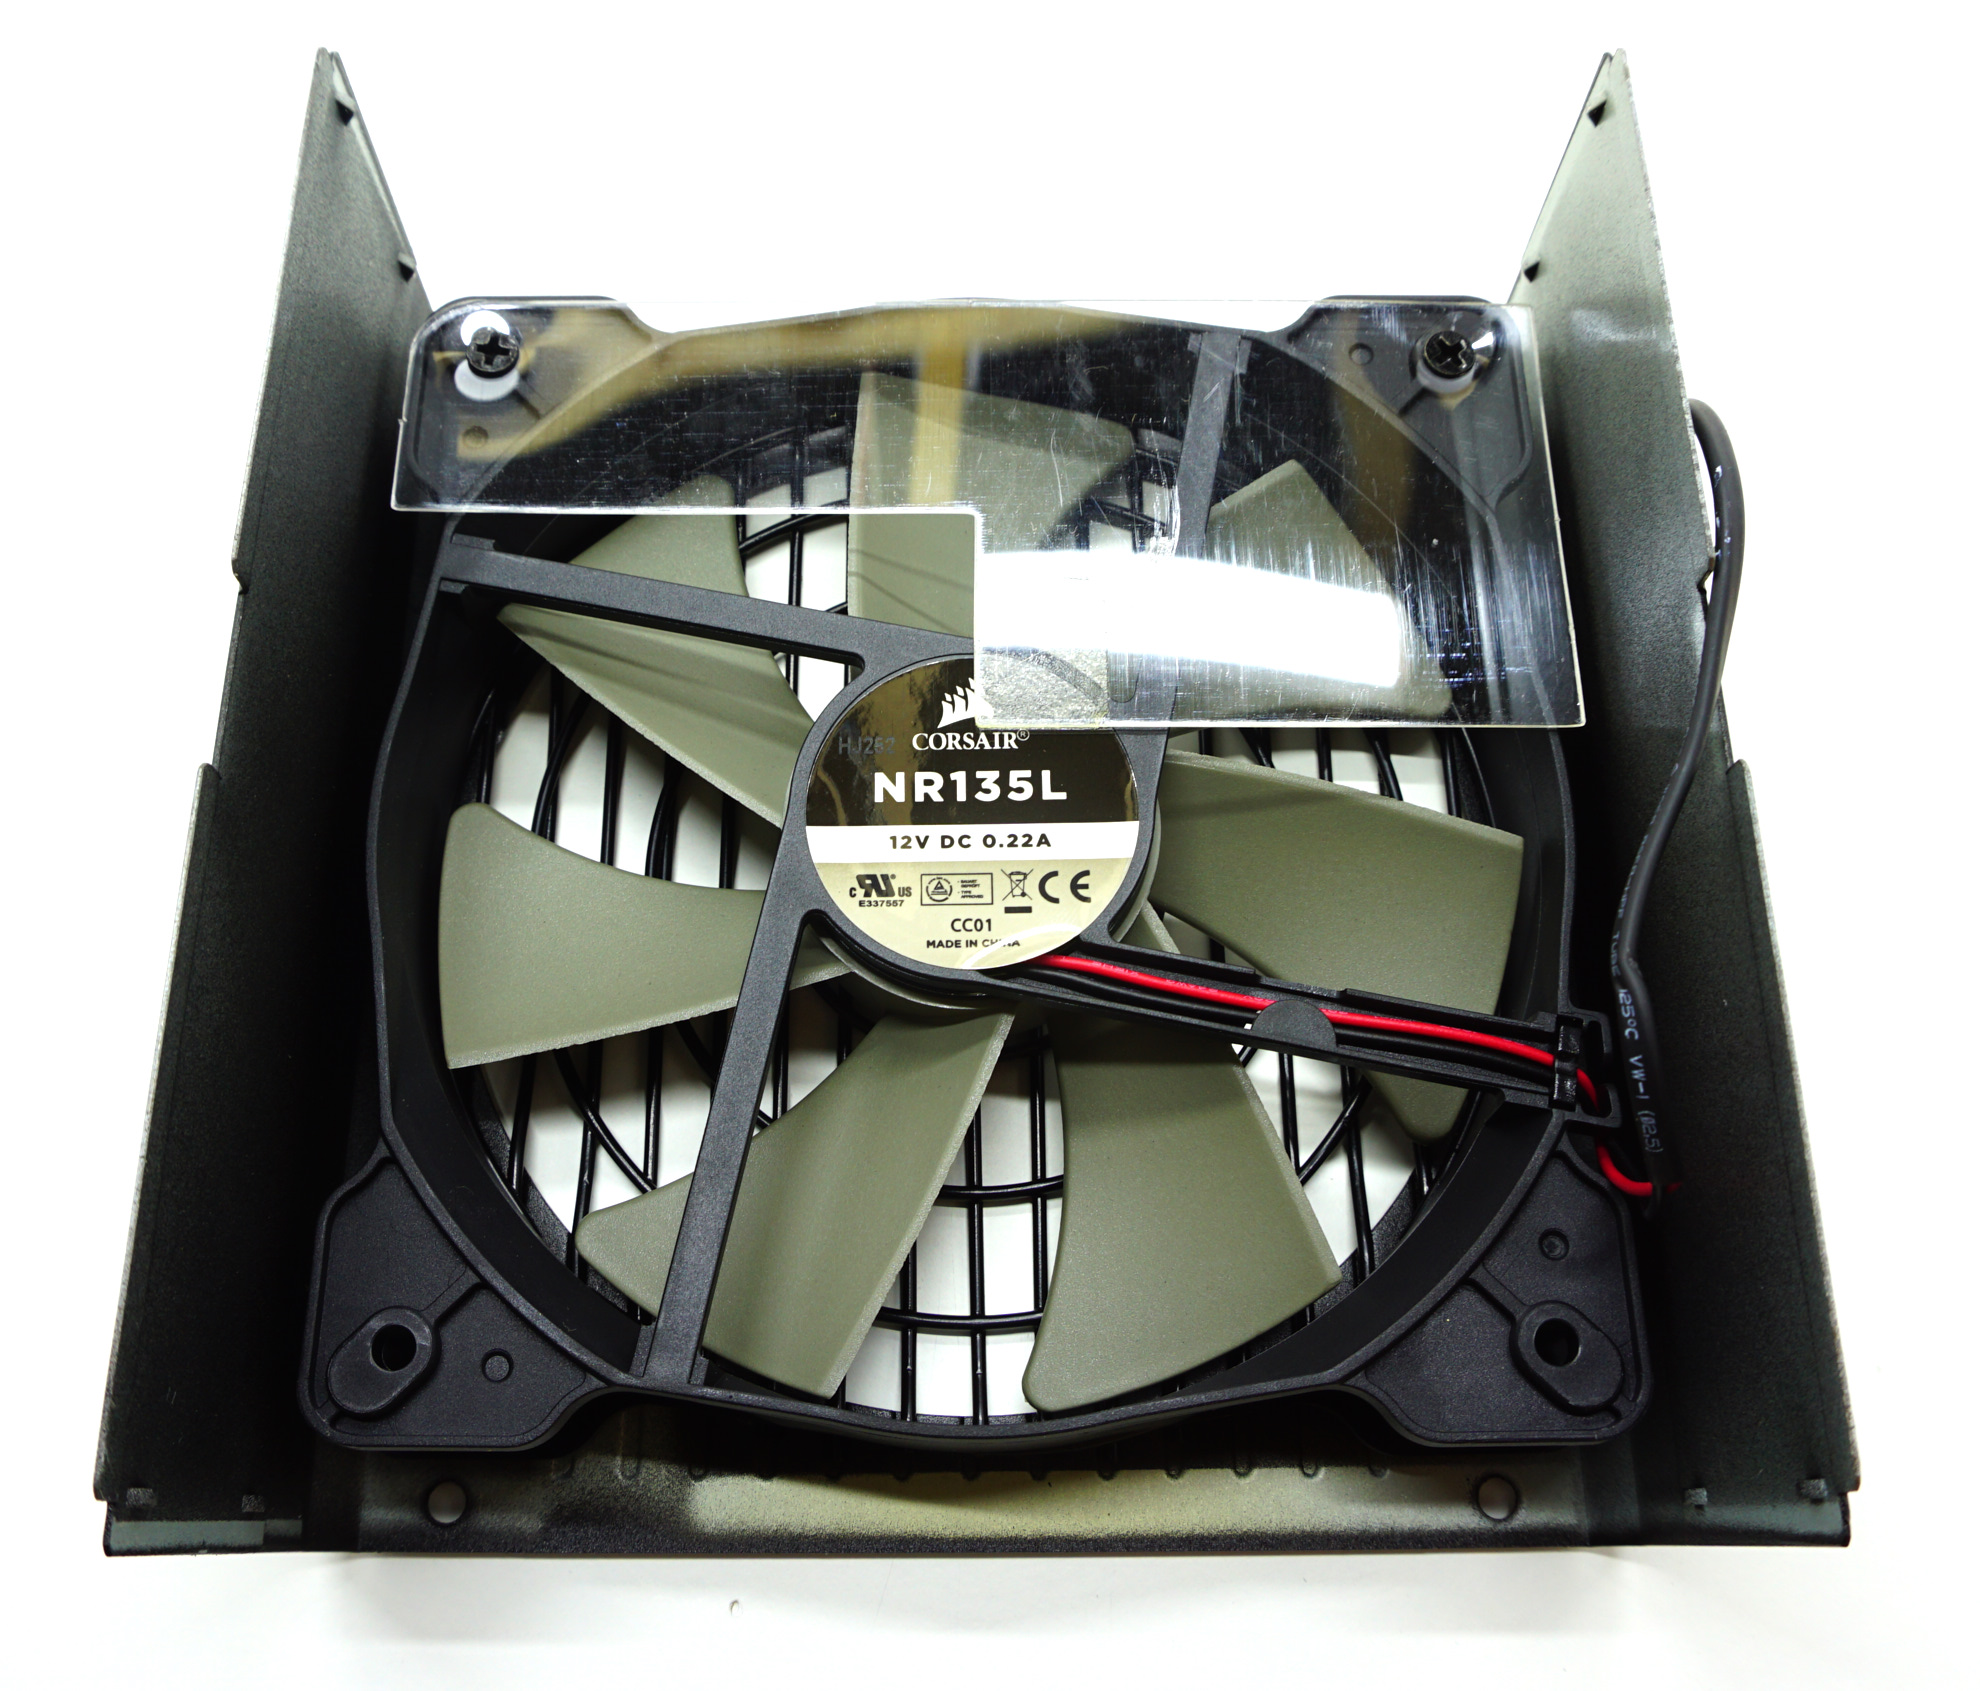
Taking the chassis apart, we first lay eyes on the 135 mm fan responsible for the cooling of the RM850x. It is a Corsair NR135L, a fan we are used to seeing in the company’s medium-to-low output products. The presence of the medium speed fan hints that the efficiency of the RM850x has been significantly improved in comparison to the previous generation of units. It is a rifle bearing fan that may not be as prestigious as the fluid-dynamic bearing (FDB) fans that Corsair is using in some of their other models. However, the RM850x features full range fan control with a passive mode, meaning that the PSU’s thermal circuitry will not even start the fan unless the additional cooling becomes necessary.
Most of Corsair's middle range PSUs are made by Channel Well Technologies (CWT) and the RM850x is no exception. The previous versions of the RM850x/RM850 were also made by CWT. This platform is largely based on the previous model but there are several enhancements, with most of them done to improve the unit's efficiency. However, there are also a few modifications that improve the unit's long-term reliability and resilience to damage from external (AC) faults.
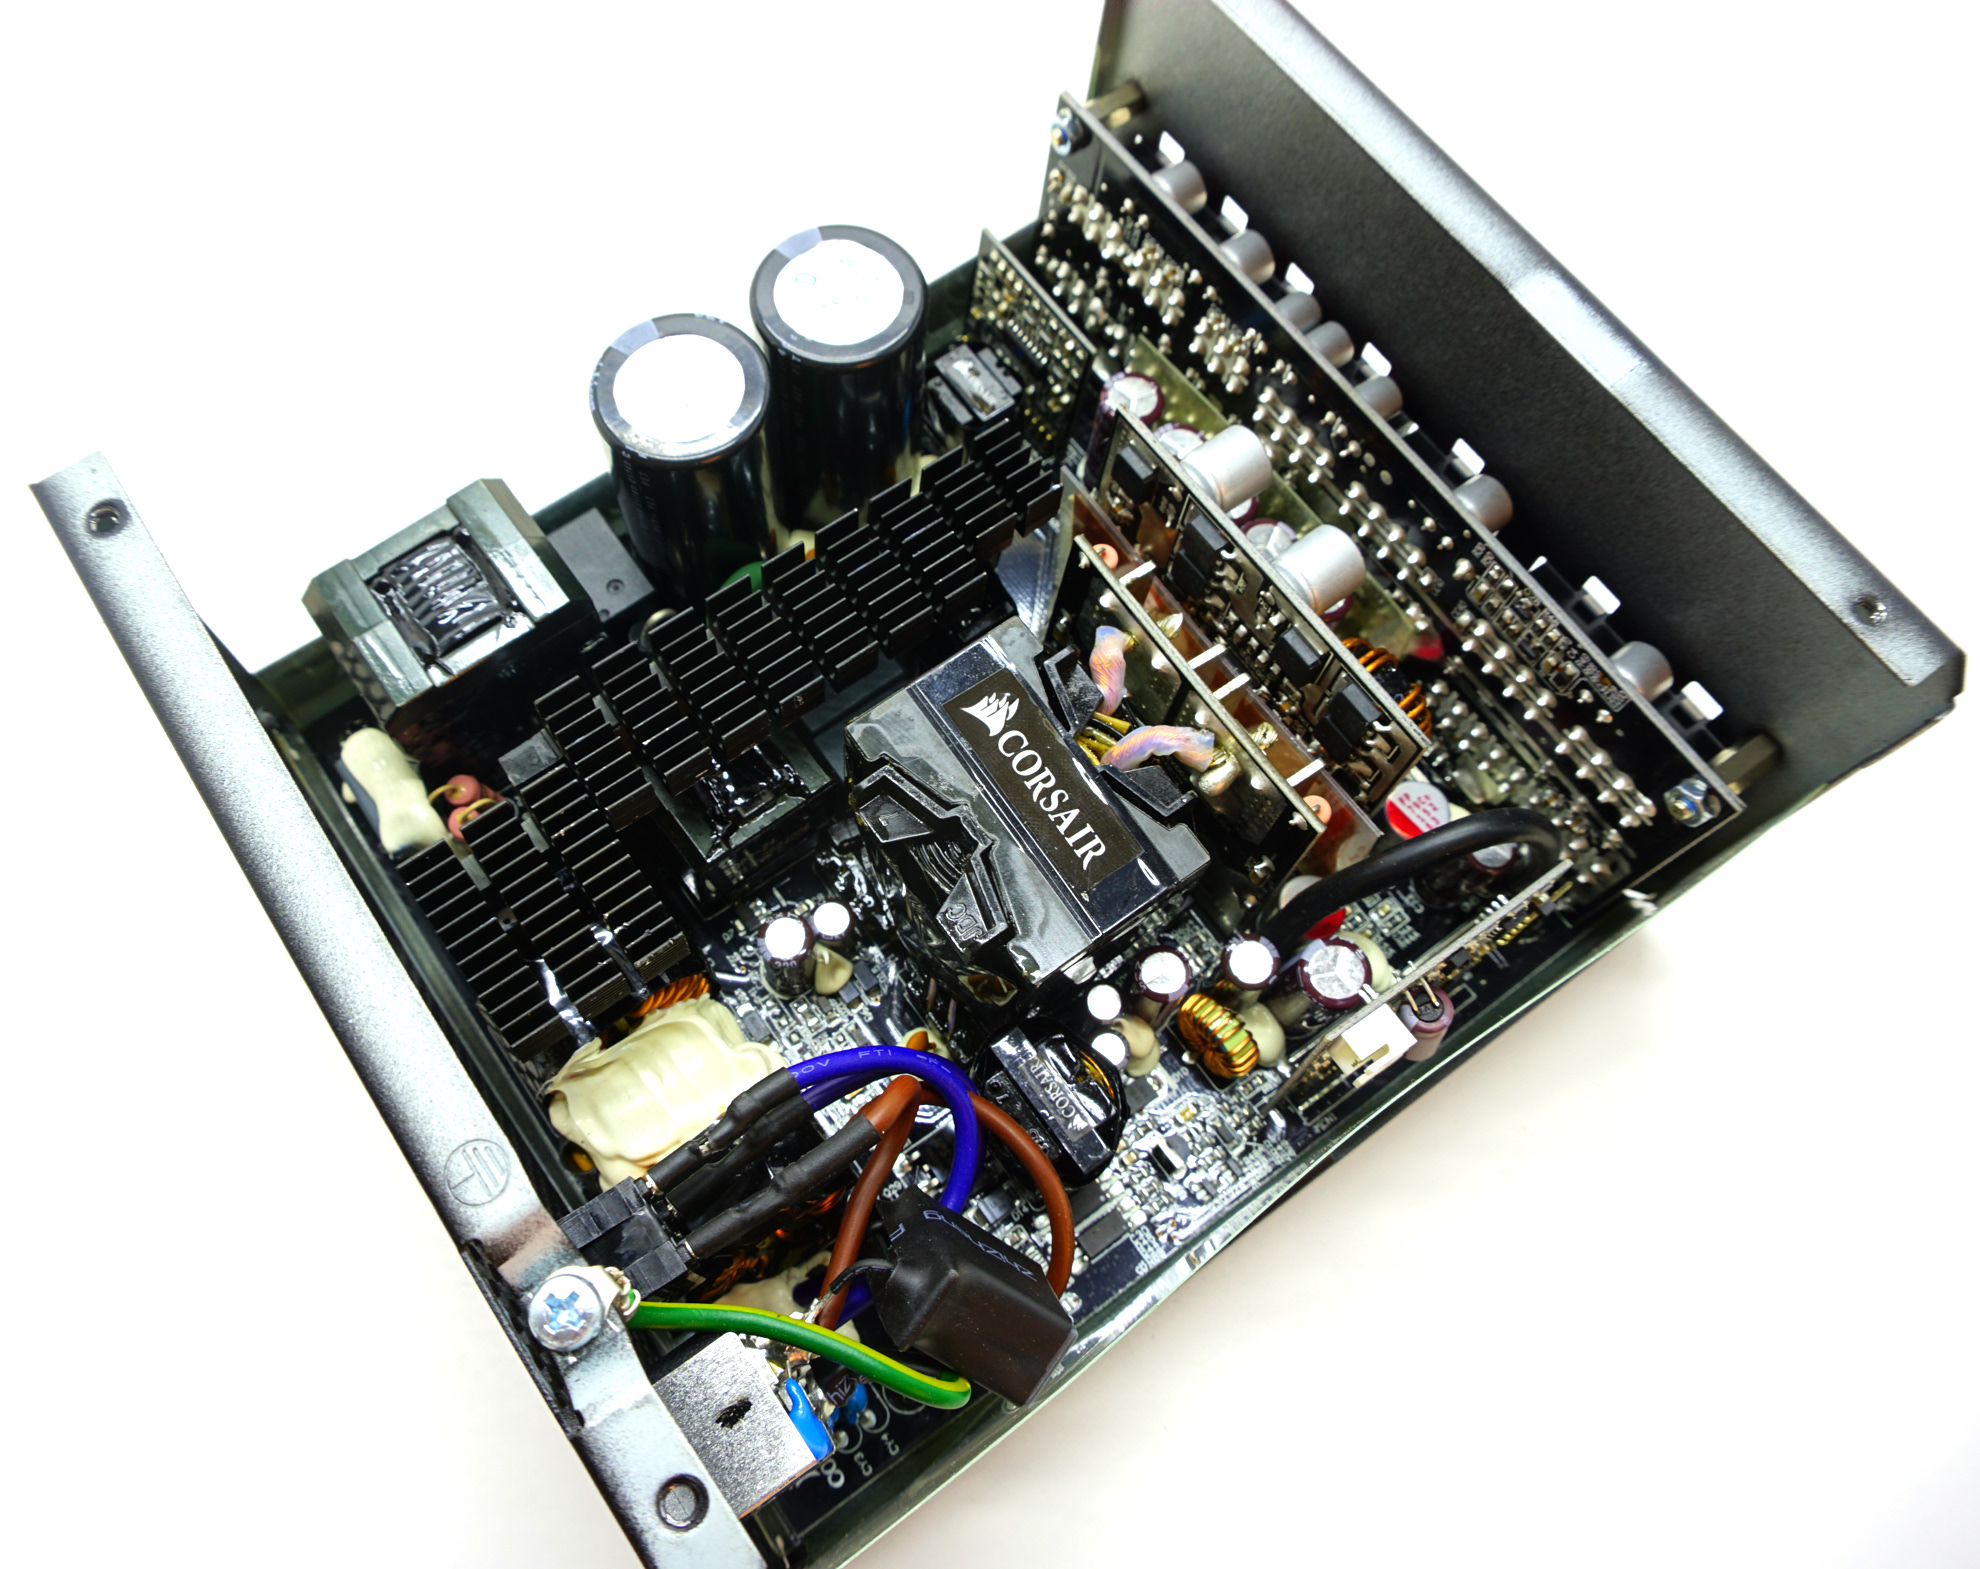
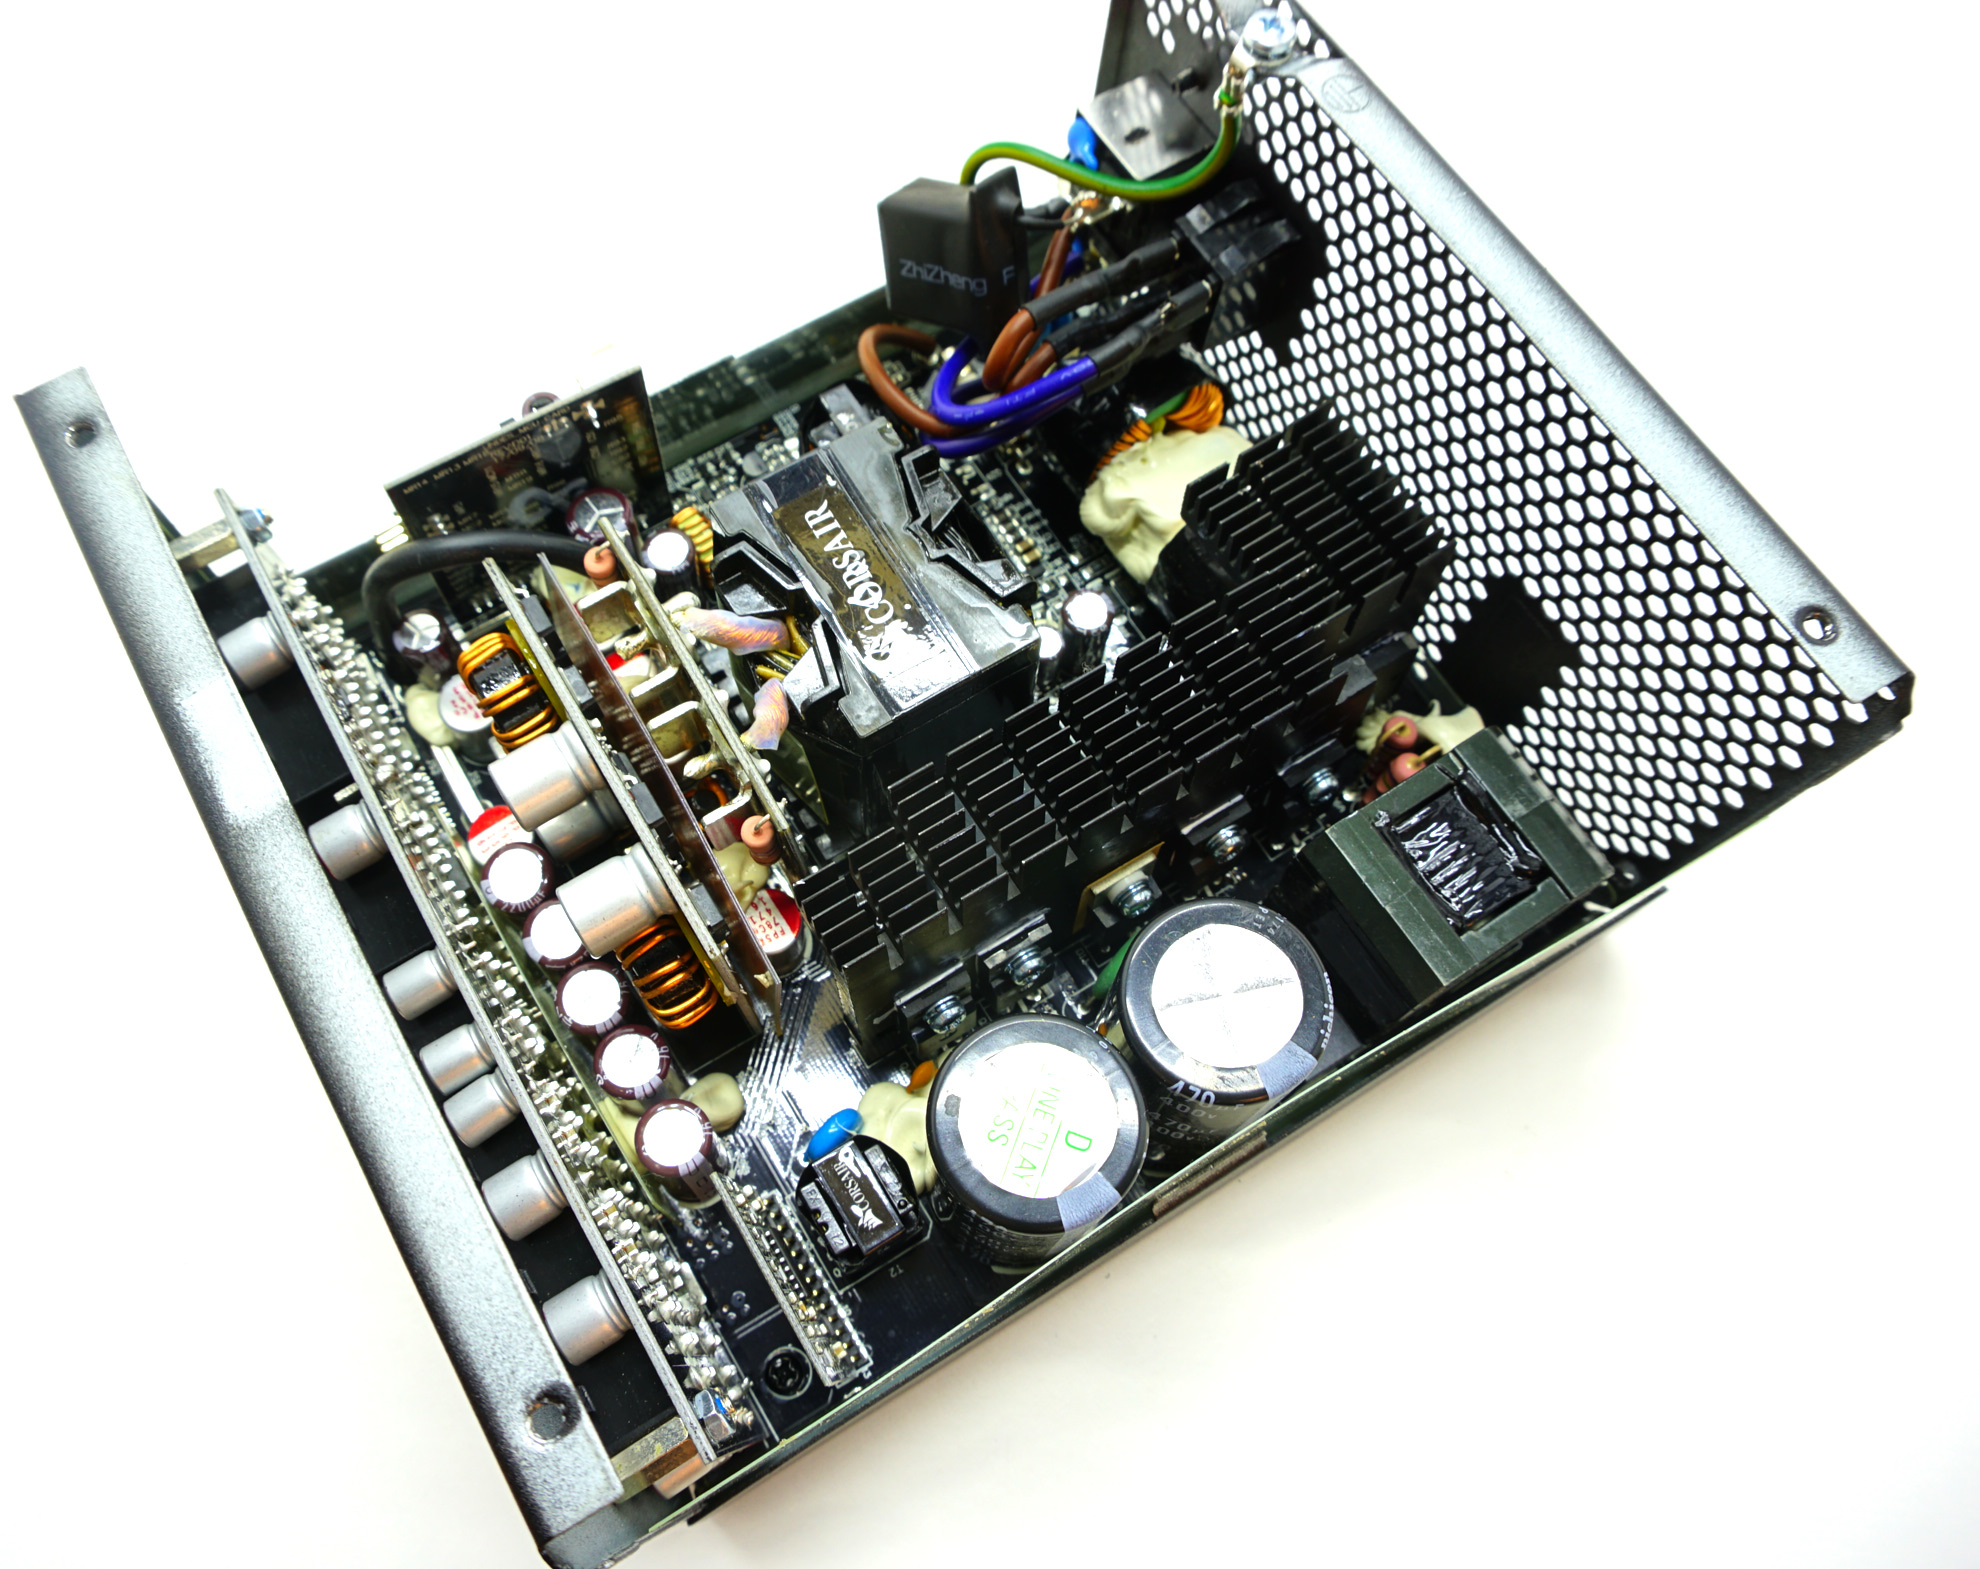
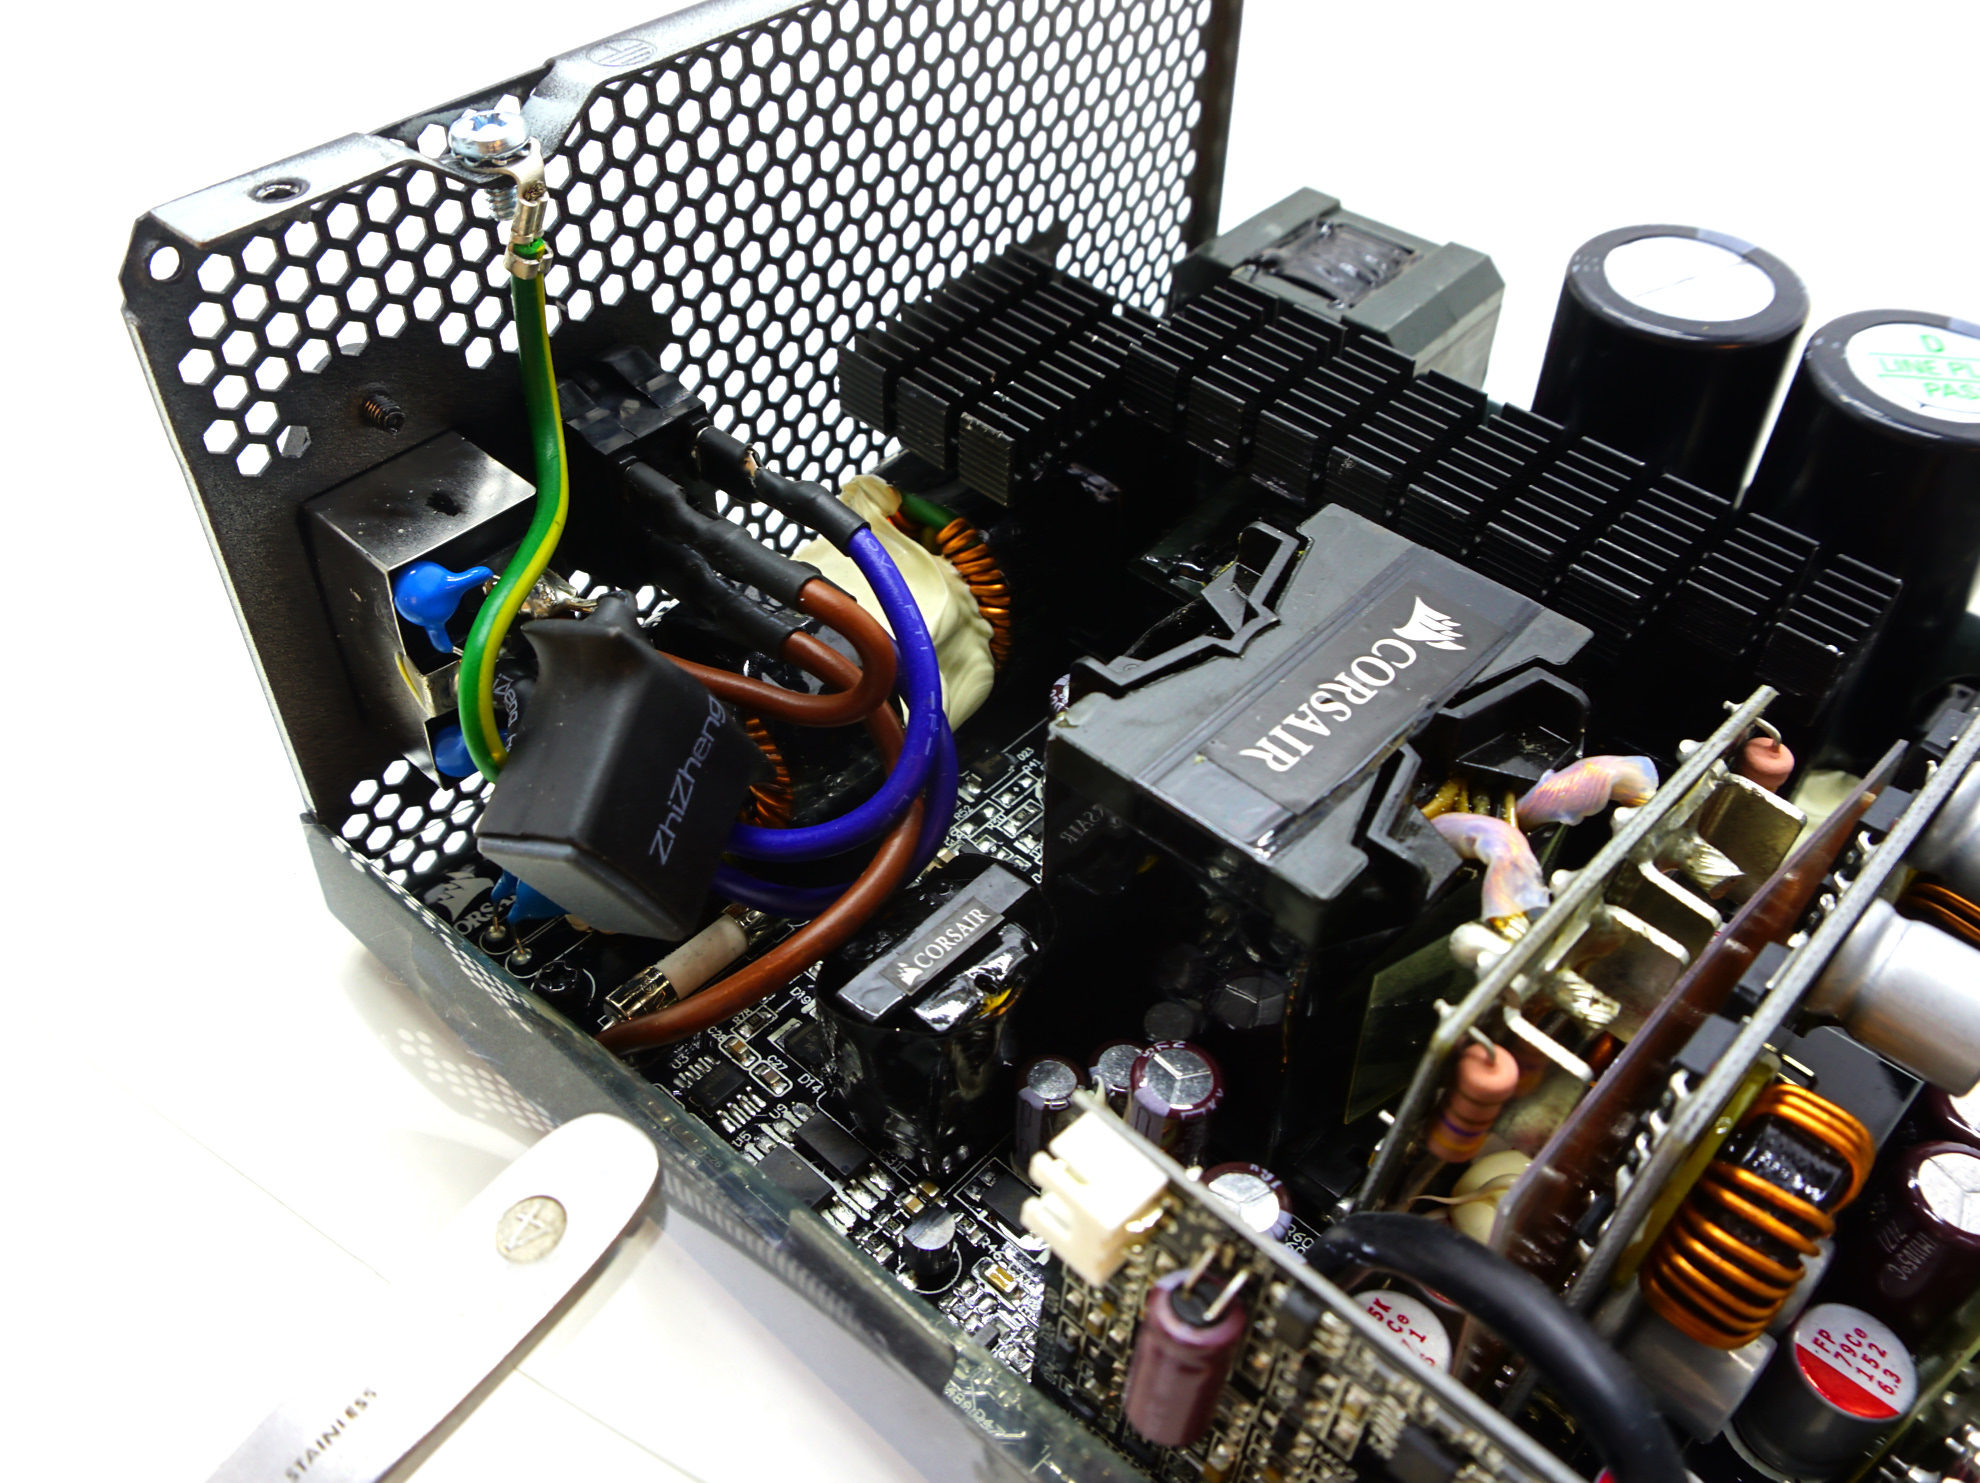
The heatsinks of the RM850x are adequate for a high efficiency PSU with that kind of output. Keeping its hybrid fan mode in mind, it is obvious that the designer wanted the RM850x to have a reasonably large operational range before the fan becomes necessary. The input filtering stage begins at the rear of the AC receptacle and continues onto the main PCB, with four Y capacitors, two X capacitors and two filtering inductors. No surprises here, that is pretty much the standard for high output consumer-grade PSUs. CWT added a relay here to bypass the NTC thermistor after the PSU starts, giving the RM850x a slight efficiency boost.
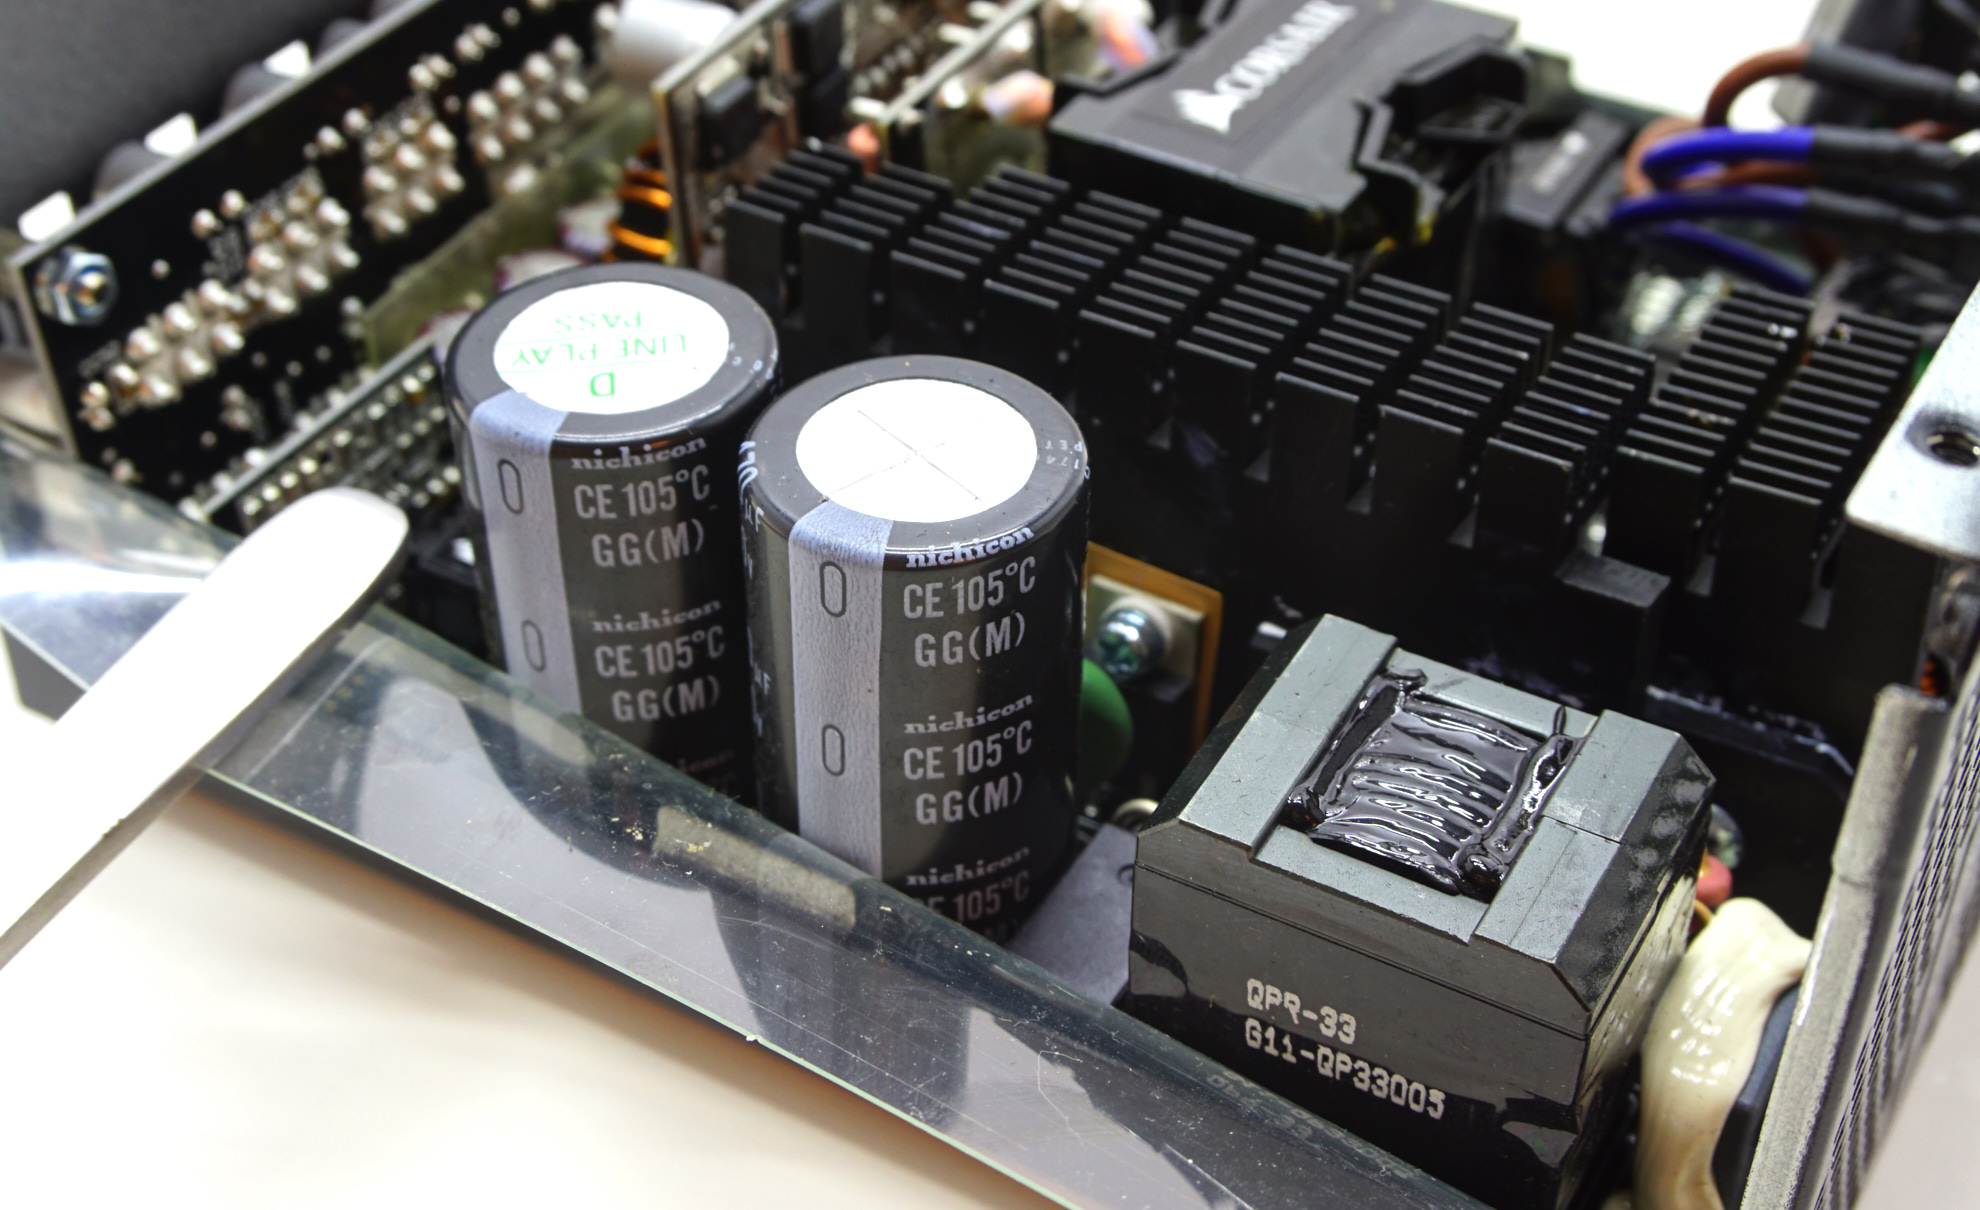
The RM850x has two input rectifier bridges with their own heatsink sandwiched between them, which heatsink is very large compared to what we are used to seeing in units with this kind of power output. The APFC circuitry is almost typical, with two MOSFETs and a diode. A fourth active component is present though, a SPN5003 Enhancement Mode FET, which minimizes the RM850x's current draw under no-load conditions. The passive components of the APFC circuitry are two Nichicon capacitors rated at 400V / 470μF each, plus a filtering inductor that is fully enclosed into insulation material. The insulation material is probably not intended for protection, but rather to prevent electromechanical vibrations that would result in noise (also known as “coil whine”). CWT extends this practice to nearly all the filtering inductors found inside their premium designs.
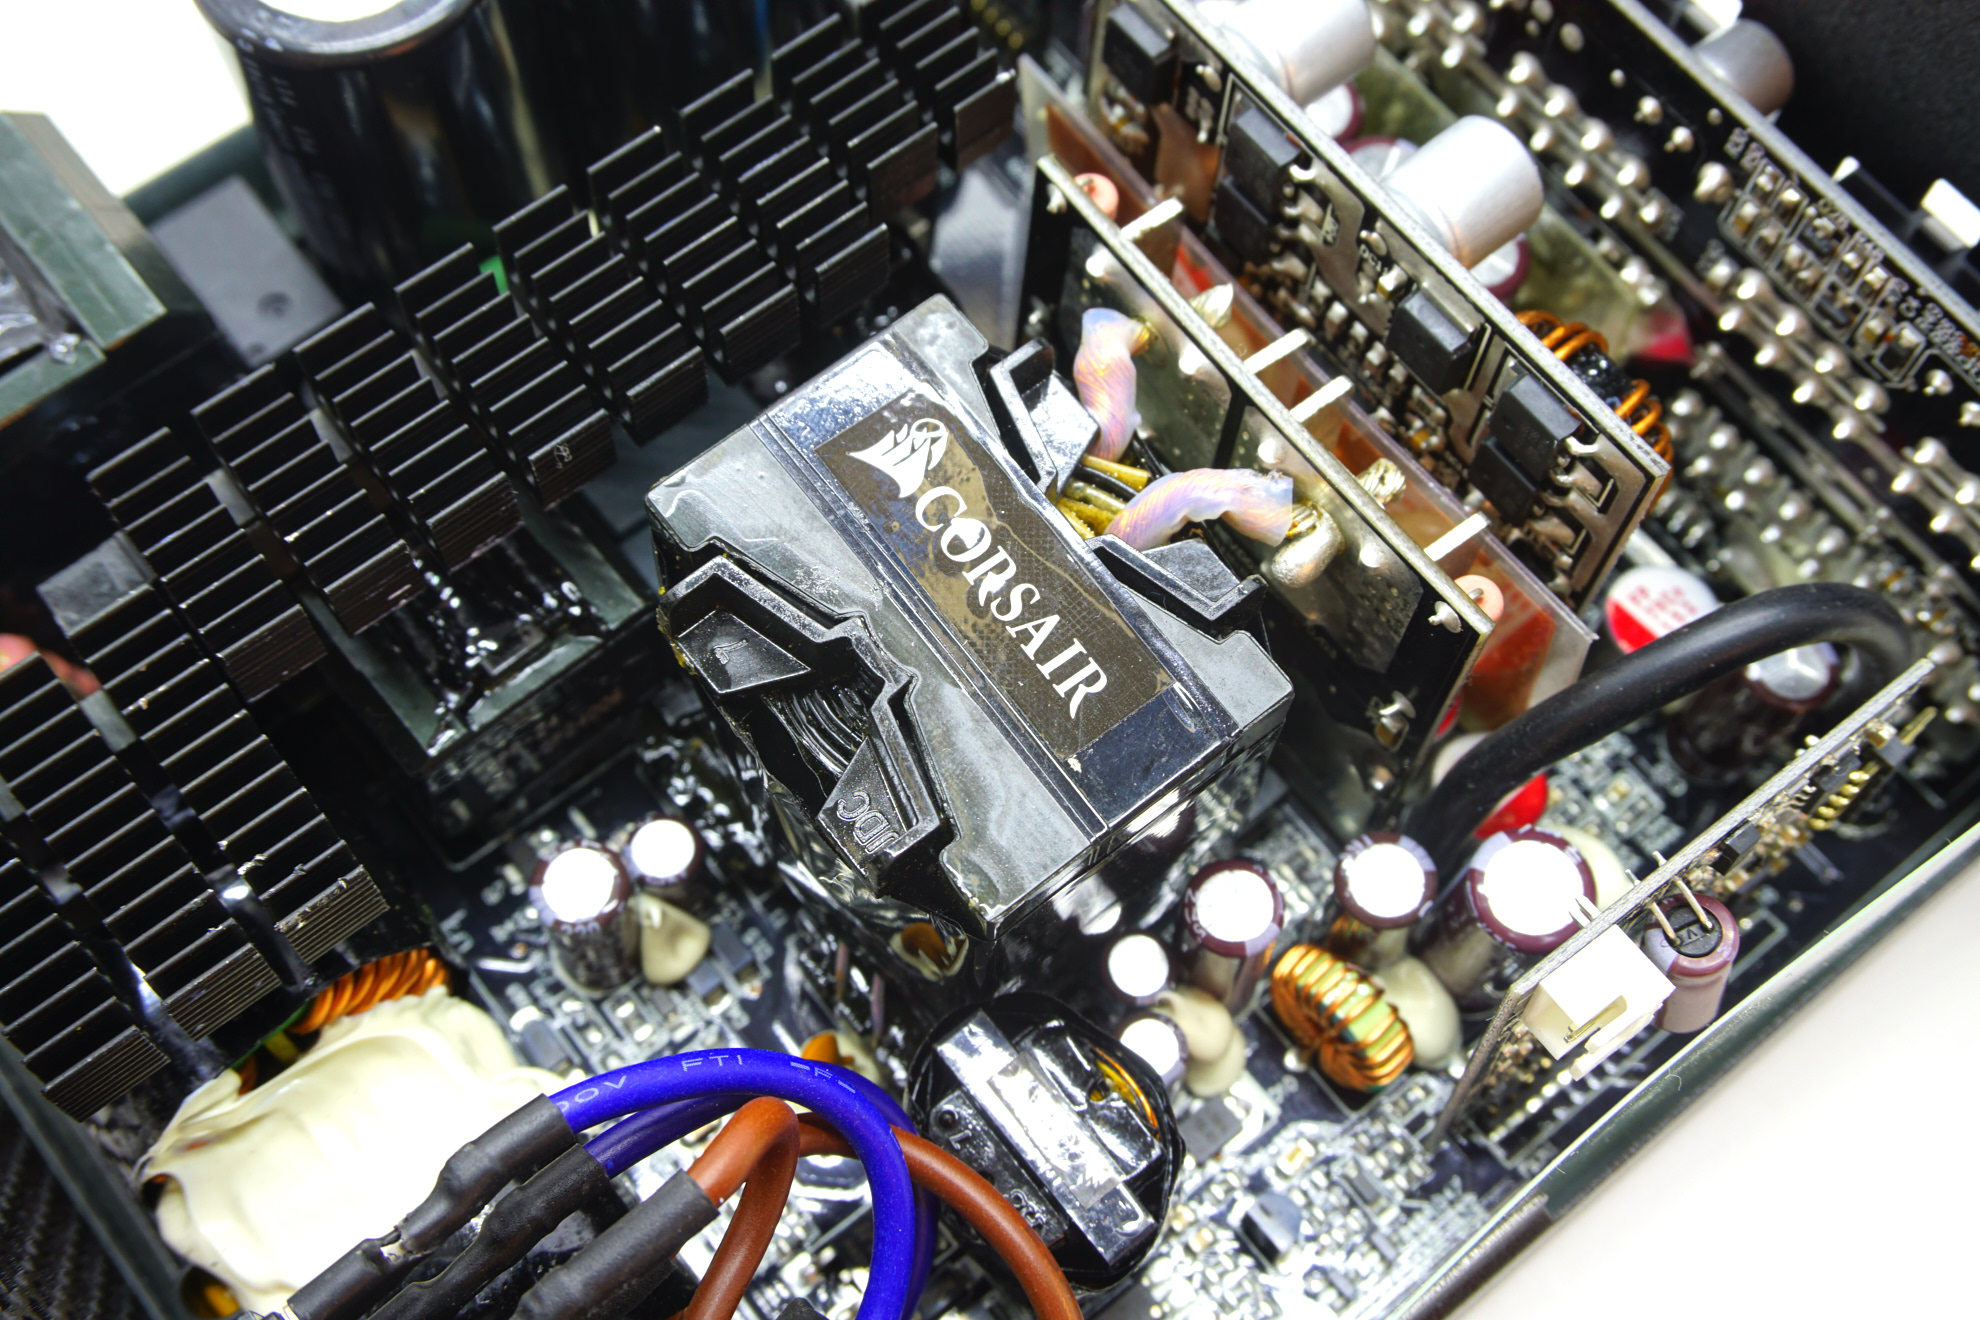
Two MOSFETs form an LLC resonant half-bridge inversion stage, whereas six MOSFETs on the secondary side generate the 12V line of the unit. The 3.3V and 5V lines are derived via DC to DC conversion circuits found on the horizontal daughterboard at the edge of the PSU. All of the electrolytic capacitors are supplied by Nippon Chemi-Con, as are nearly all of the polymer capacitors as well. A couple of the polymer capacitors are supplied by Nichicon, making the RM850x an all-Japanese affair.


14 Comments
View All Comments
philehidiot - Thursday, August 23, 2018 - link
Just wondering, if anyone is reading this, how do you ensure the PSU is safe / fully discharged before you crack open the case? I'd hate to be on the receiving end of those primary caps discharging. As would the 16 electrodes in my thoracic spine. As would the lithium battery pack implanted in my back....Calin - Sunday, August 26, 2018 - link
You might disconnect the power cord and push the start button. Or wait until all the LEDs inside are no longer lighting up.Barrade - Wednesday, September 12, 2018 - link
Anyone else have issues with the quality of their plastic sheathed cables? I've had to RMA an entire PSU due to the 24pin being malformed & having too much wobble in general. The PSU's themselves have been decent, however I feel they skimped on the cable quality & tollerance.JasonMZW20 - Wednesday, October 31, 2018 - link
Mine are okay on the previous RM850x. My only complaint is the spliced dual 6+2 pin PCIe connectors, but they work just the same.